Sharing a family tree
Send a link in one tap, share just part of a tree, add a passcode, or give someone full live access — and take any of it back. Every screen below is the real app.
Decide what goes out
You choose how much of the tree to send, who can open it, and for how long. Every link you make is listed where you can find and revoke it.
Opens a read-only view
They can pan, zoom, search and export — but not edit. Names are shortened and living people's dates reduced before the page ever reaches them.
Share a tree in one tap
Open the tree, then press ShareOwner
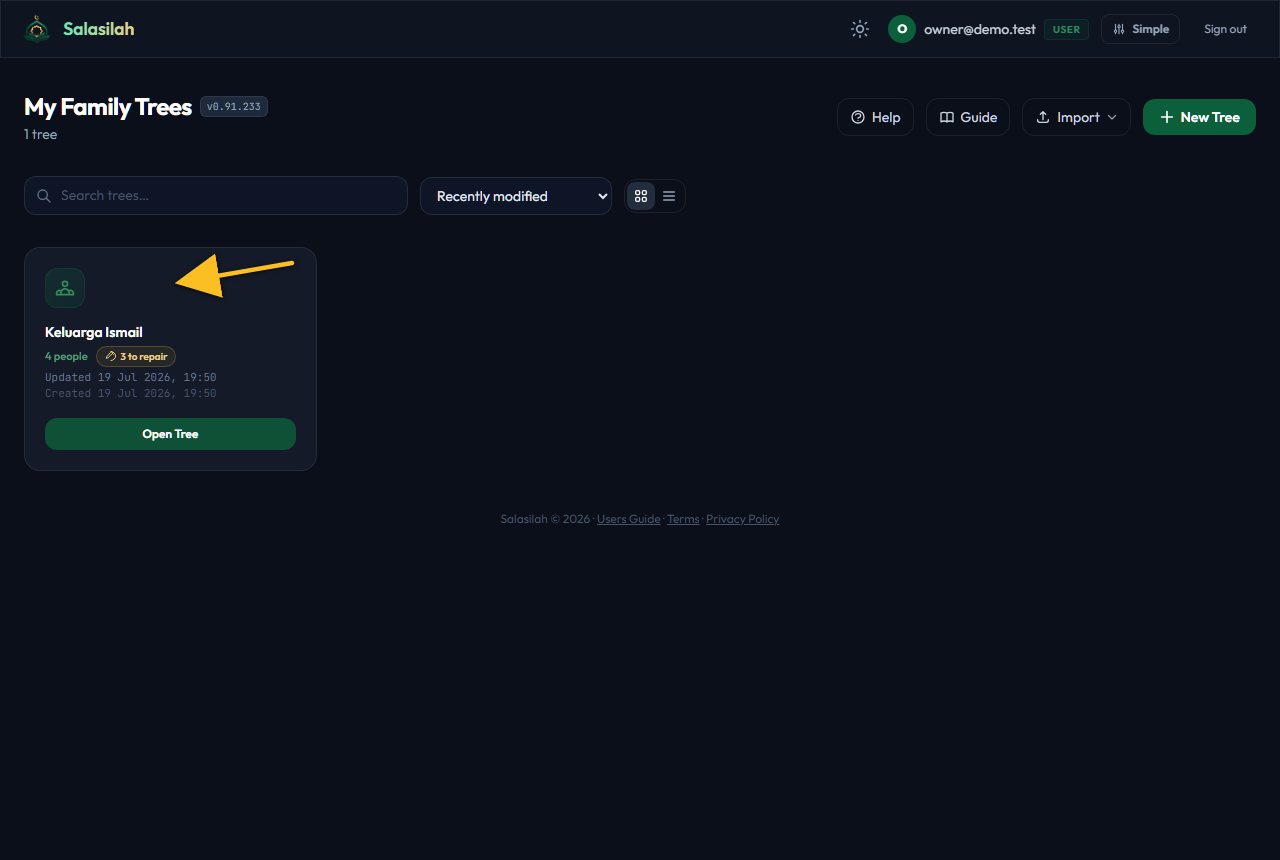
Sharing starts inside the tree, in the toolbar. There is no Share button on the dashboard tree cards: two of the three things you can send are defined by what is on your screen, so the tree has to be open.
Simple mode has one buttonOwner
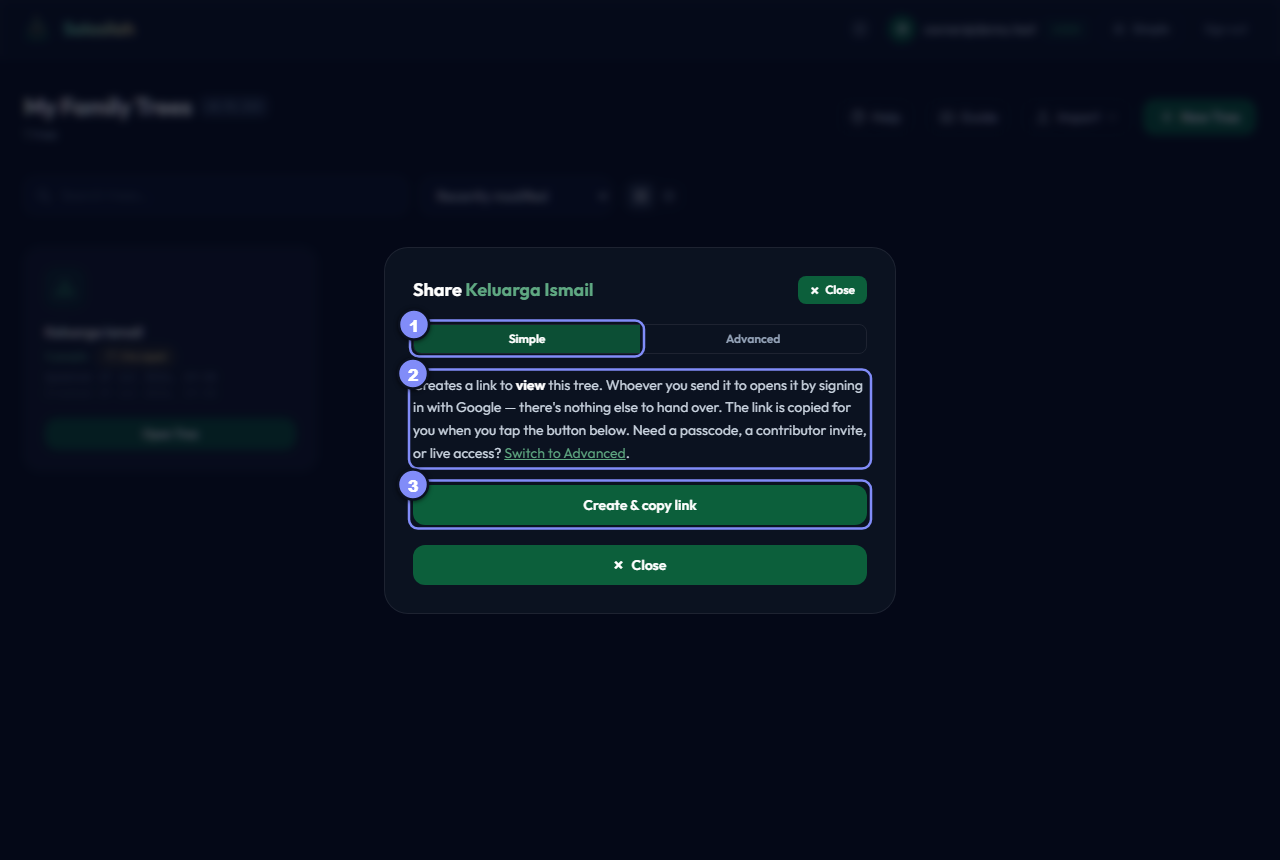
There are no decisions to make. Simple always creates a read-only view link protected by Google sign-in — so there's nothing extra to hand over.
- Simple / Advanced — the tier switch. Your choice is remembered on this device.
- One line of explanation — what the link will do, and a shortcut to Advanced if you need a passcode, a contributor invite, or live access.
- Create & copy link — makes the link and puts it on your clipboard.
The link is already copiedOwner
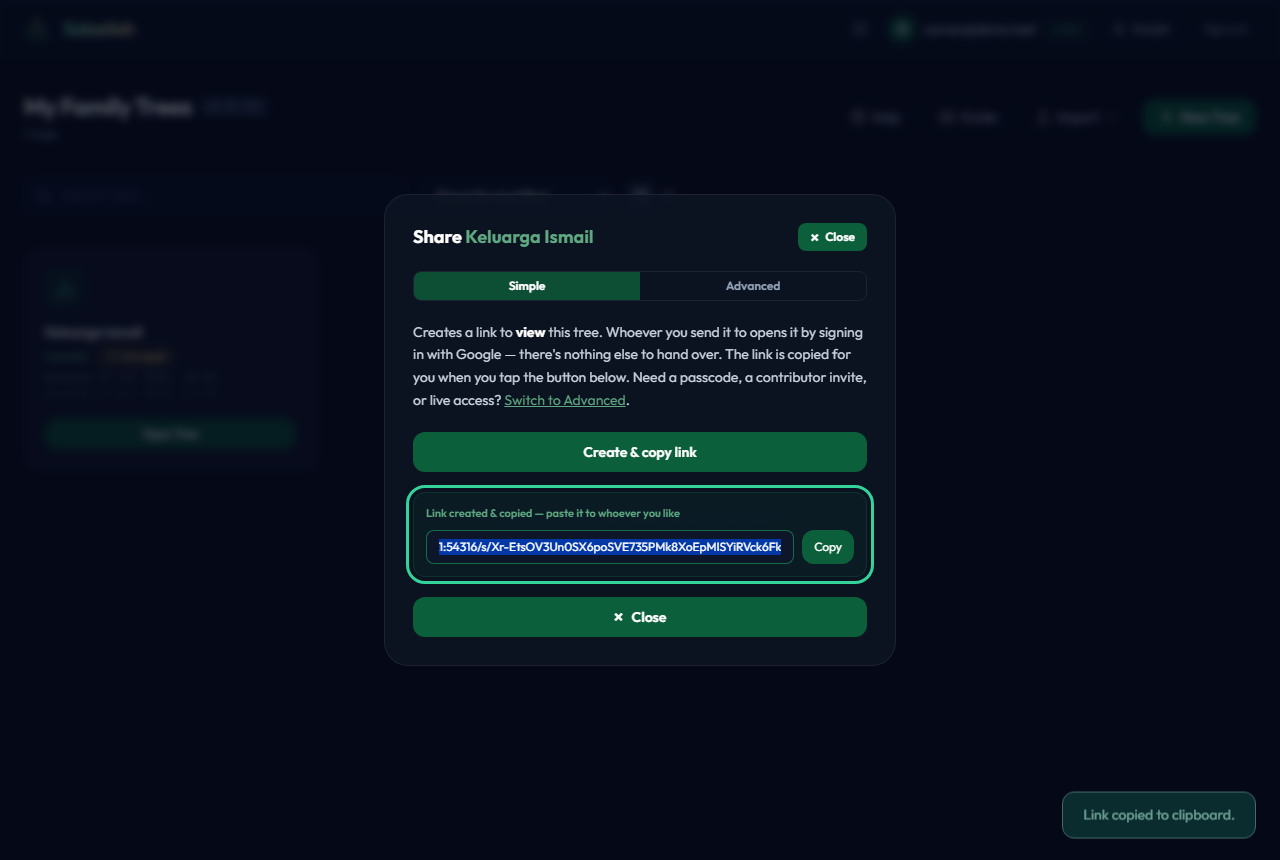
Paste it straight into WhatsApp. The link is also shown and pre-selected in the box, so if your browser blocks the automatic copy you can still tap Copy.
What your relative actually sees
They open the linkRecipient
A welcome screen names the tree they've been invited to. The notice at the bottom explains the privacy rules up front, so nobody thinks the shortened names are a mistake.

The same tree, two different viewsRecipient
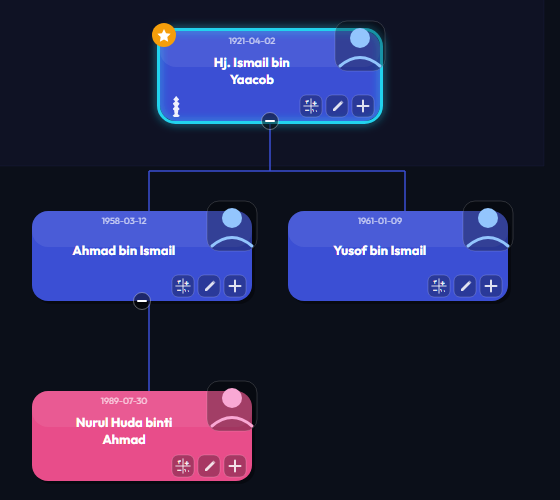
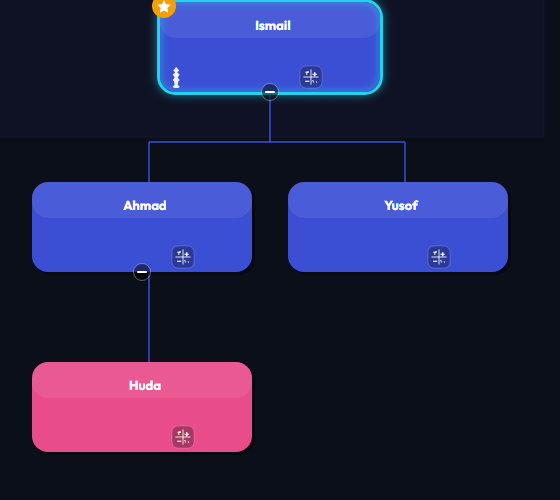
This is the part worth understanding. Below is the same tree, at the same moment — on the left as you see it, on the right as your relative sees it through the link.
Full names become a single given name. Ahmad bin Ismail becomes just Ahmad — note that this also removes his father's name. Living people's birth dates disappear from the card, and private notes are never sent at all.
What they can do with itRecipient
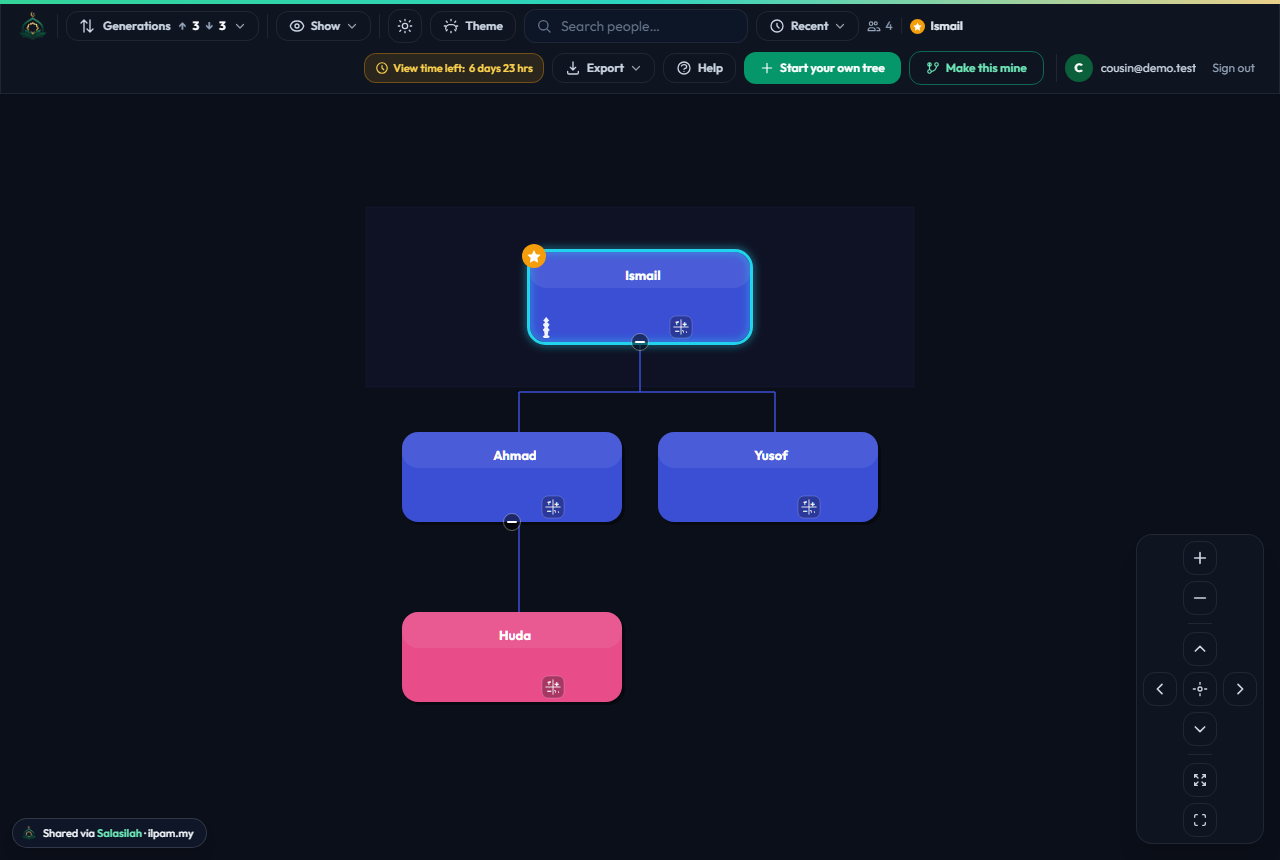
The shared view has its own slim toolbar. They can change how many generations show, search, switch theme, and Export the tree as an image or PDF — but there's no Add Person or edit control anywhere, because the link is read-only.
- View time left — the link's expiry, shown honestly so nobody is surprised when it stops working.
- Start your own tree — the way a relative goes from looking at yours to building their own.
Share only part of a tree
Pick how much to sendOwner
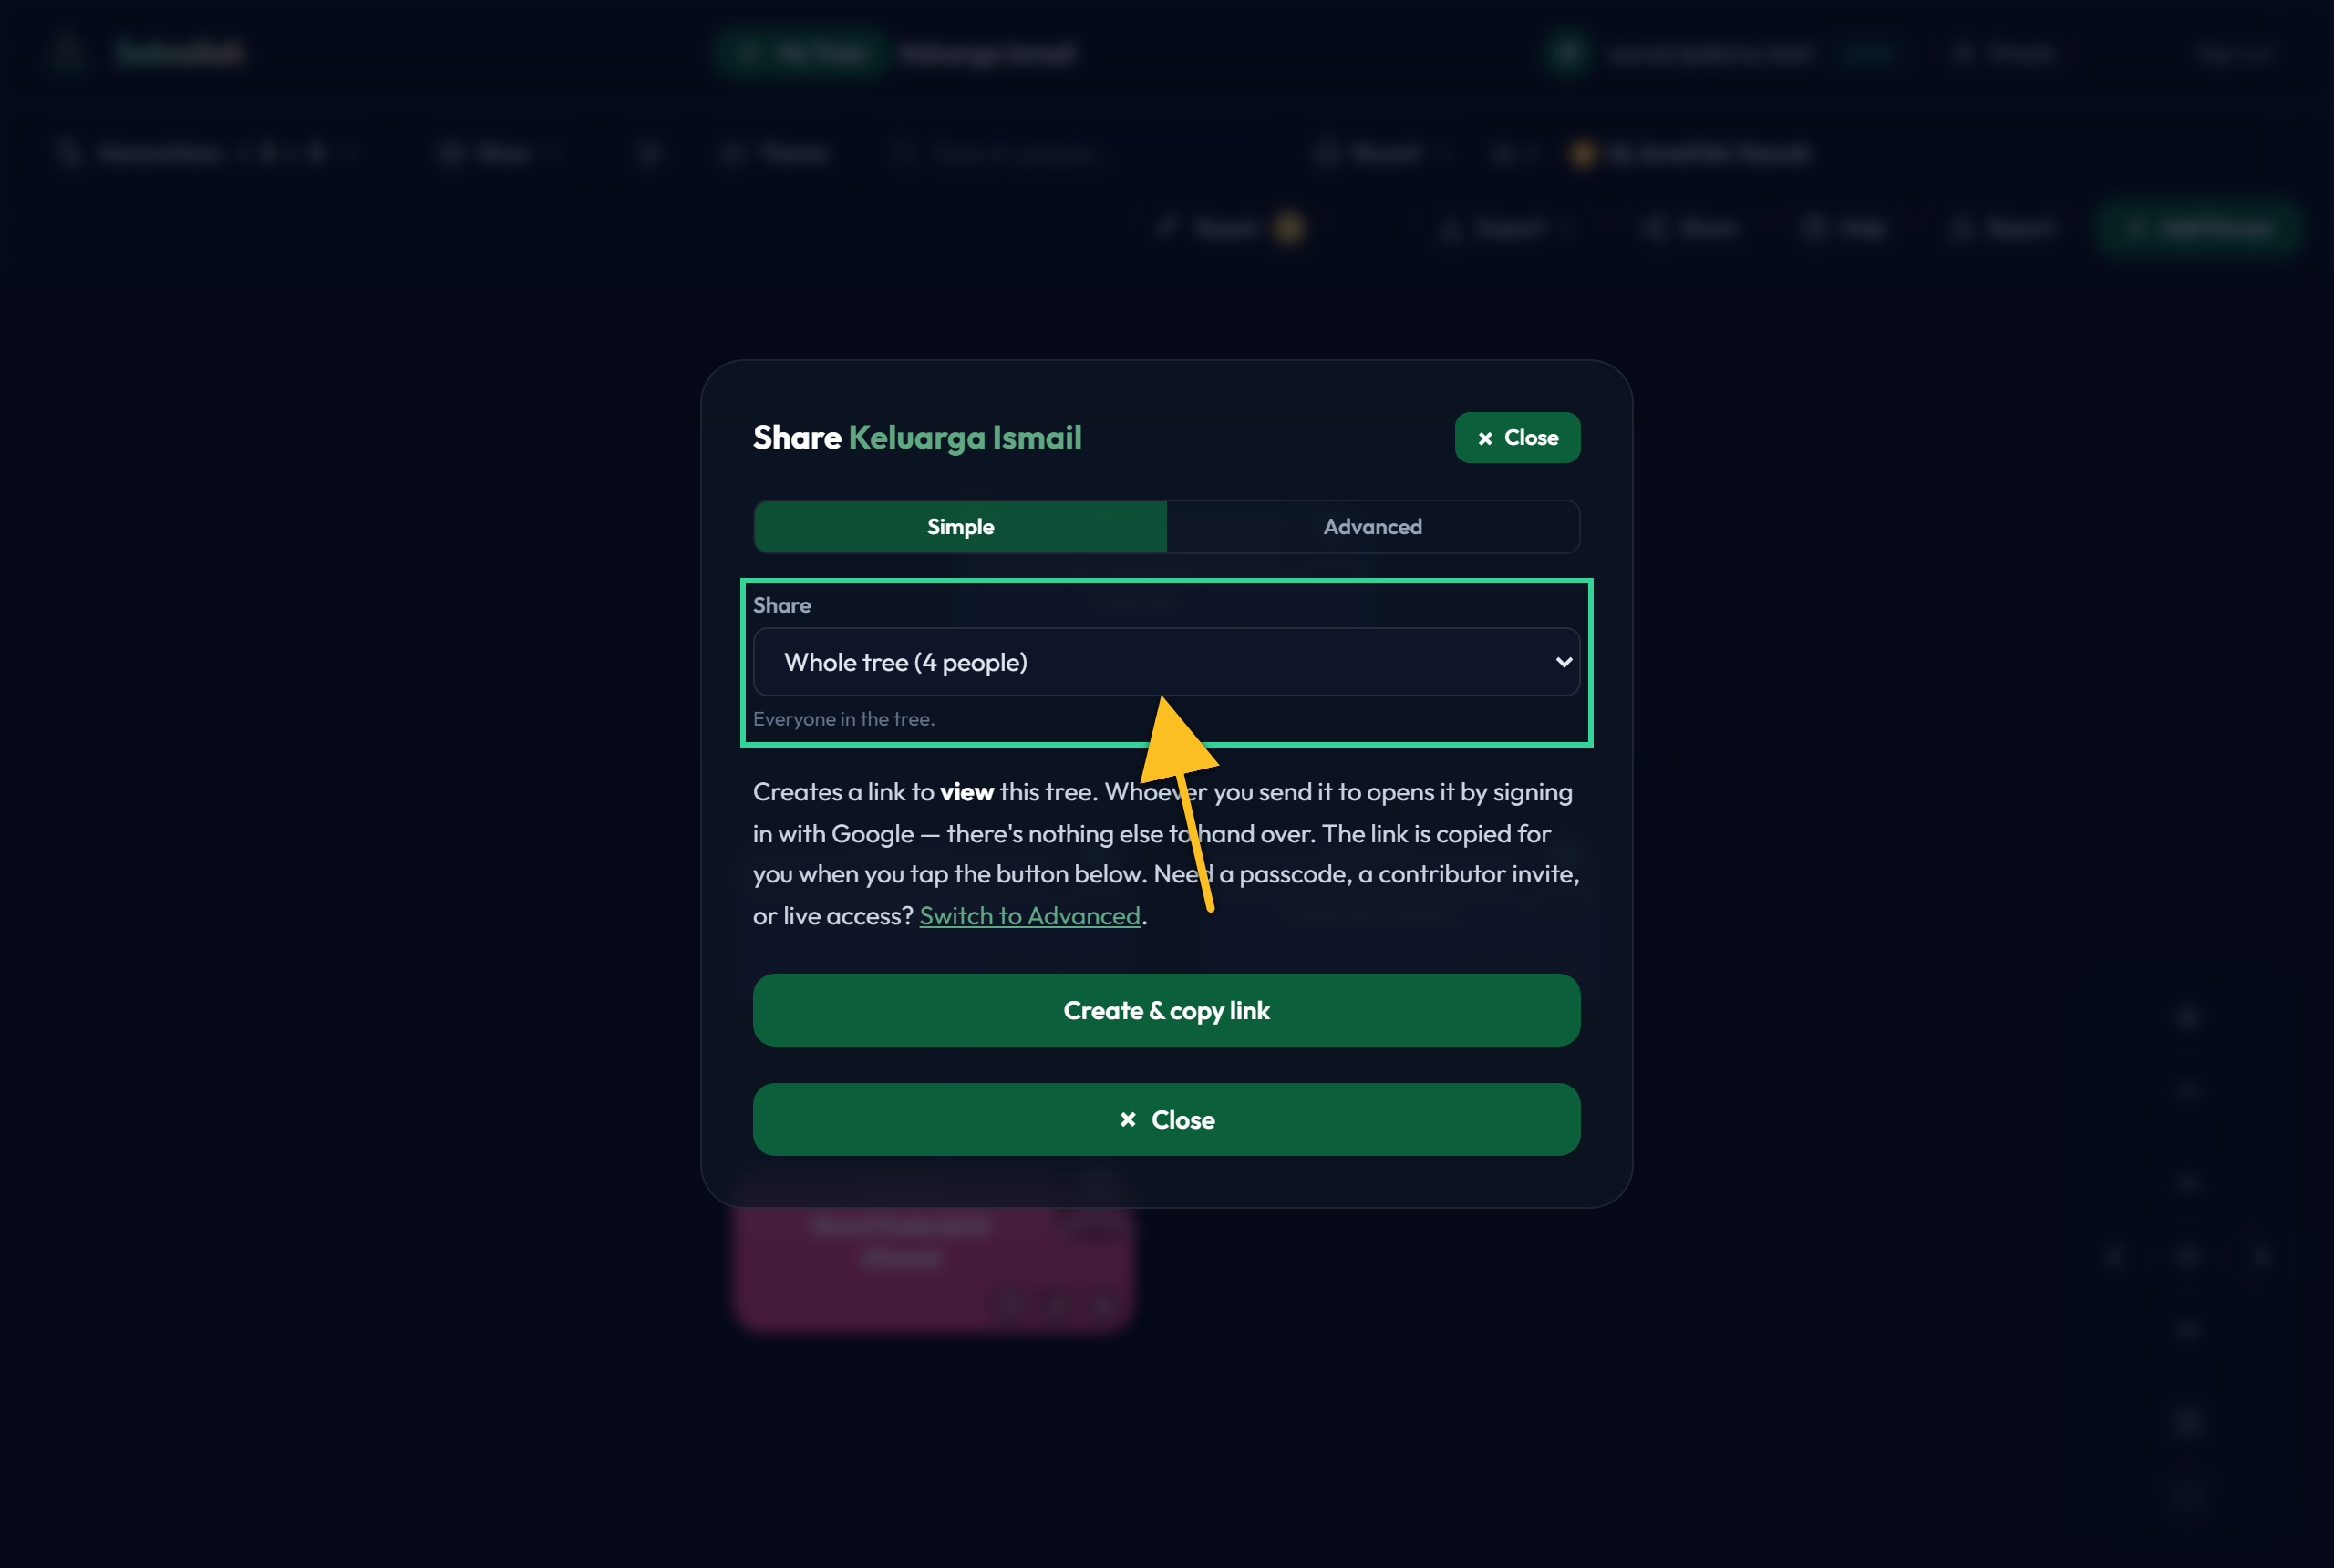
A Share selector appears at the top of the form with three choices, each showing how many people it covers:
- Whole tree — everyone. The default, so one-tap sharing stays one tap.
- Current Tree View — exactly the people on your screen right now.
- [Person]'s bloodline — that person's ancestors and descendants, plus their direct spouses.
The selector shows in both Simple and Advanced, so you can still create a scoped share in one tap.
Advanced: choose what they can do
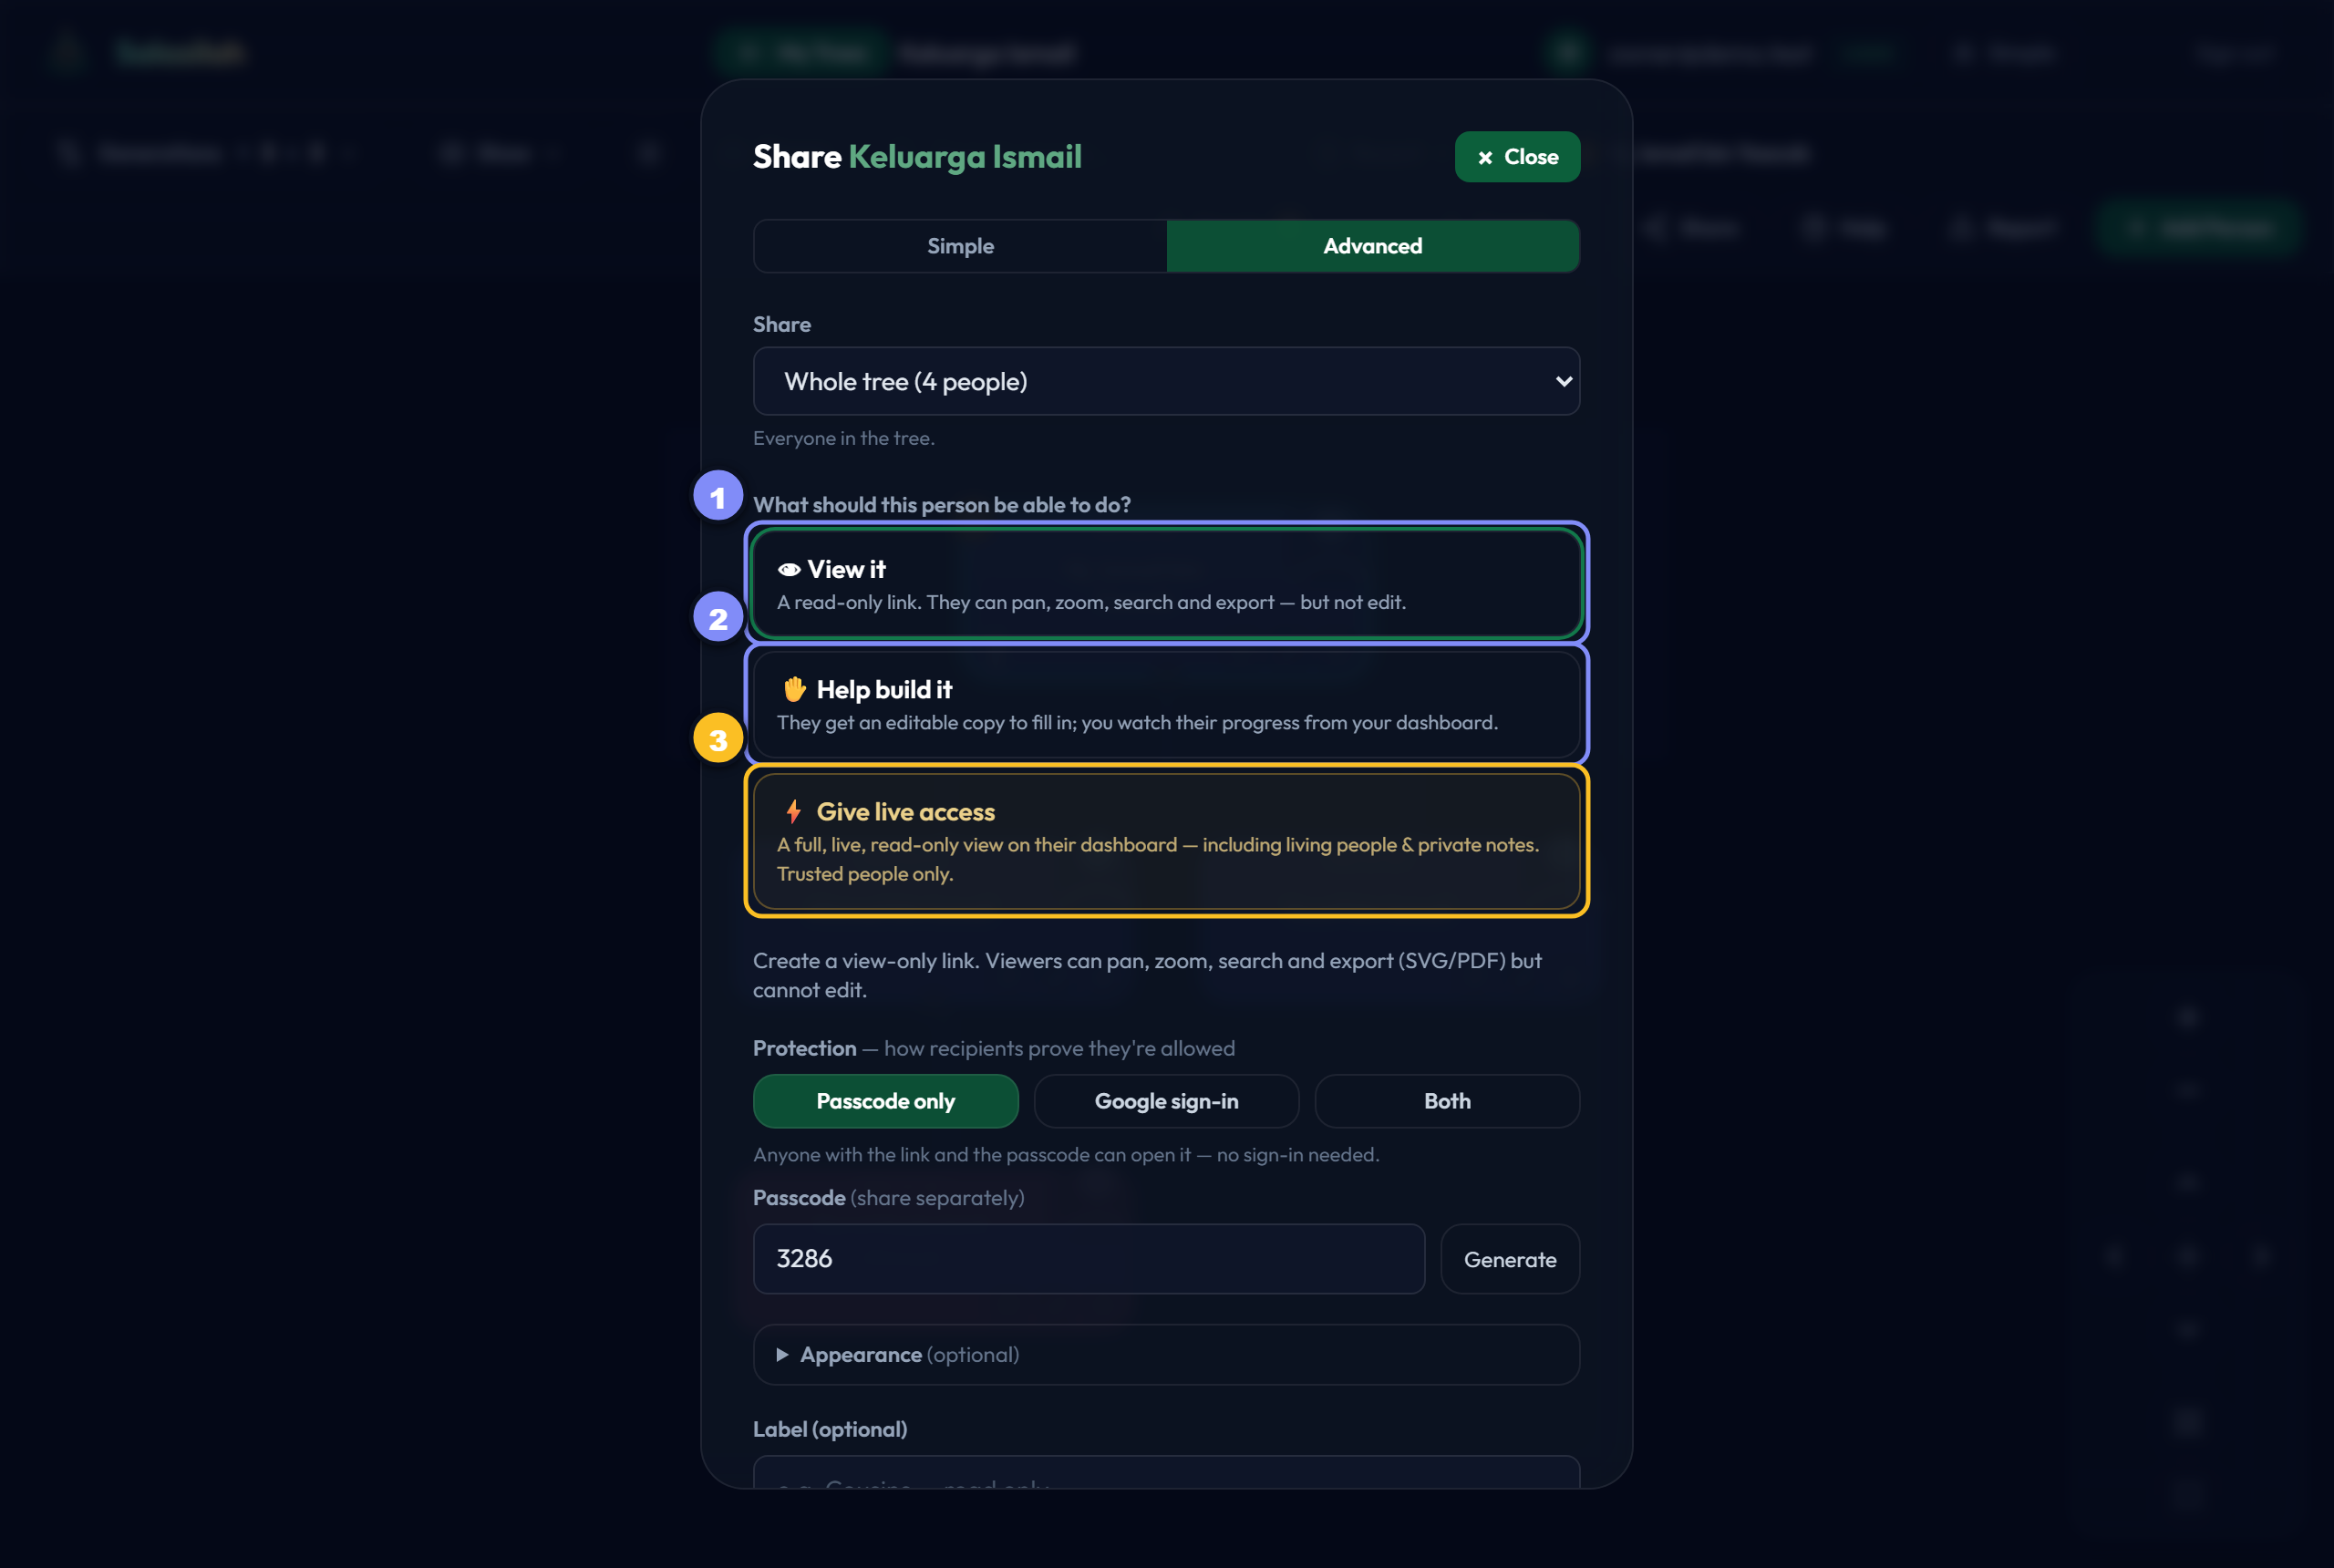
One question firstOwner
Advanced asks "what should this person be able to do?" and then shows only the settings that matter for your answer.
- View it — a read-only link. Pan, zoom, search, export; no editing.
- Help build it — they get an editable copy to fill in and you merge their work back later. This is the door into collaboration, which has its own guide.
- Give live access — the amber one. Full, live, unredacted. See Part E.
Decide who can open itOwner
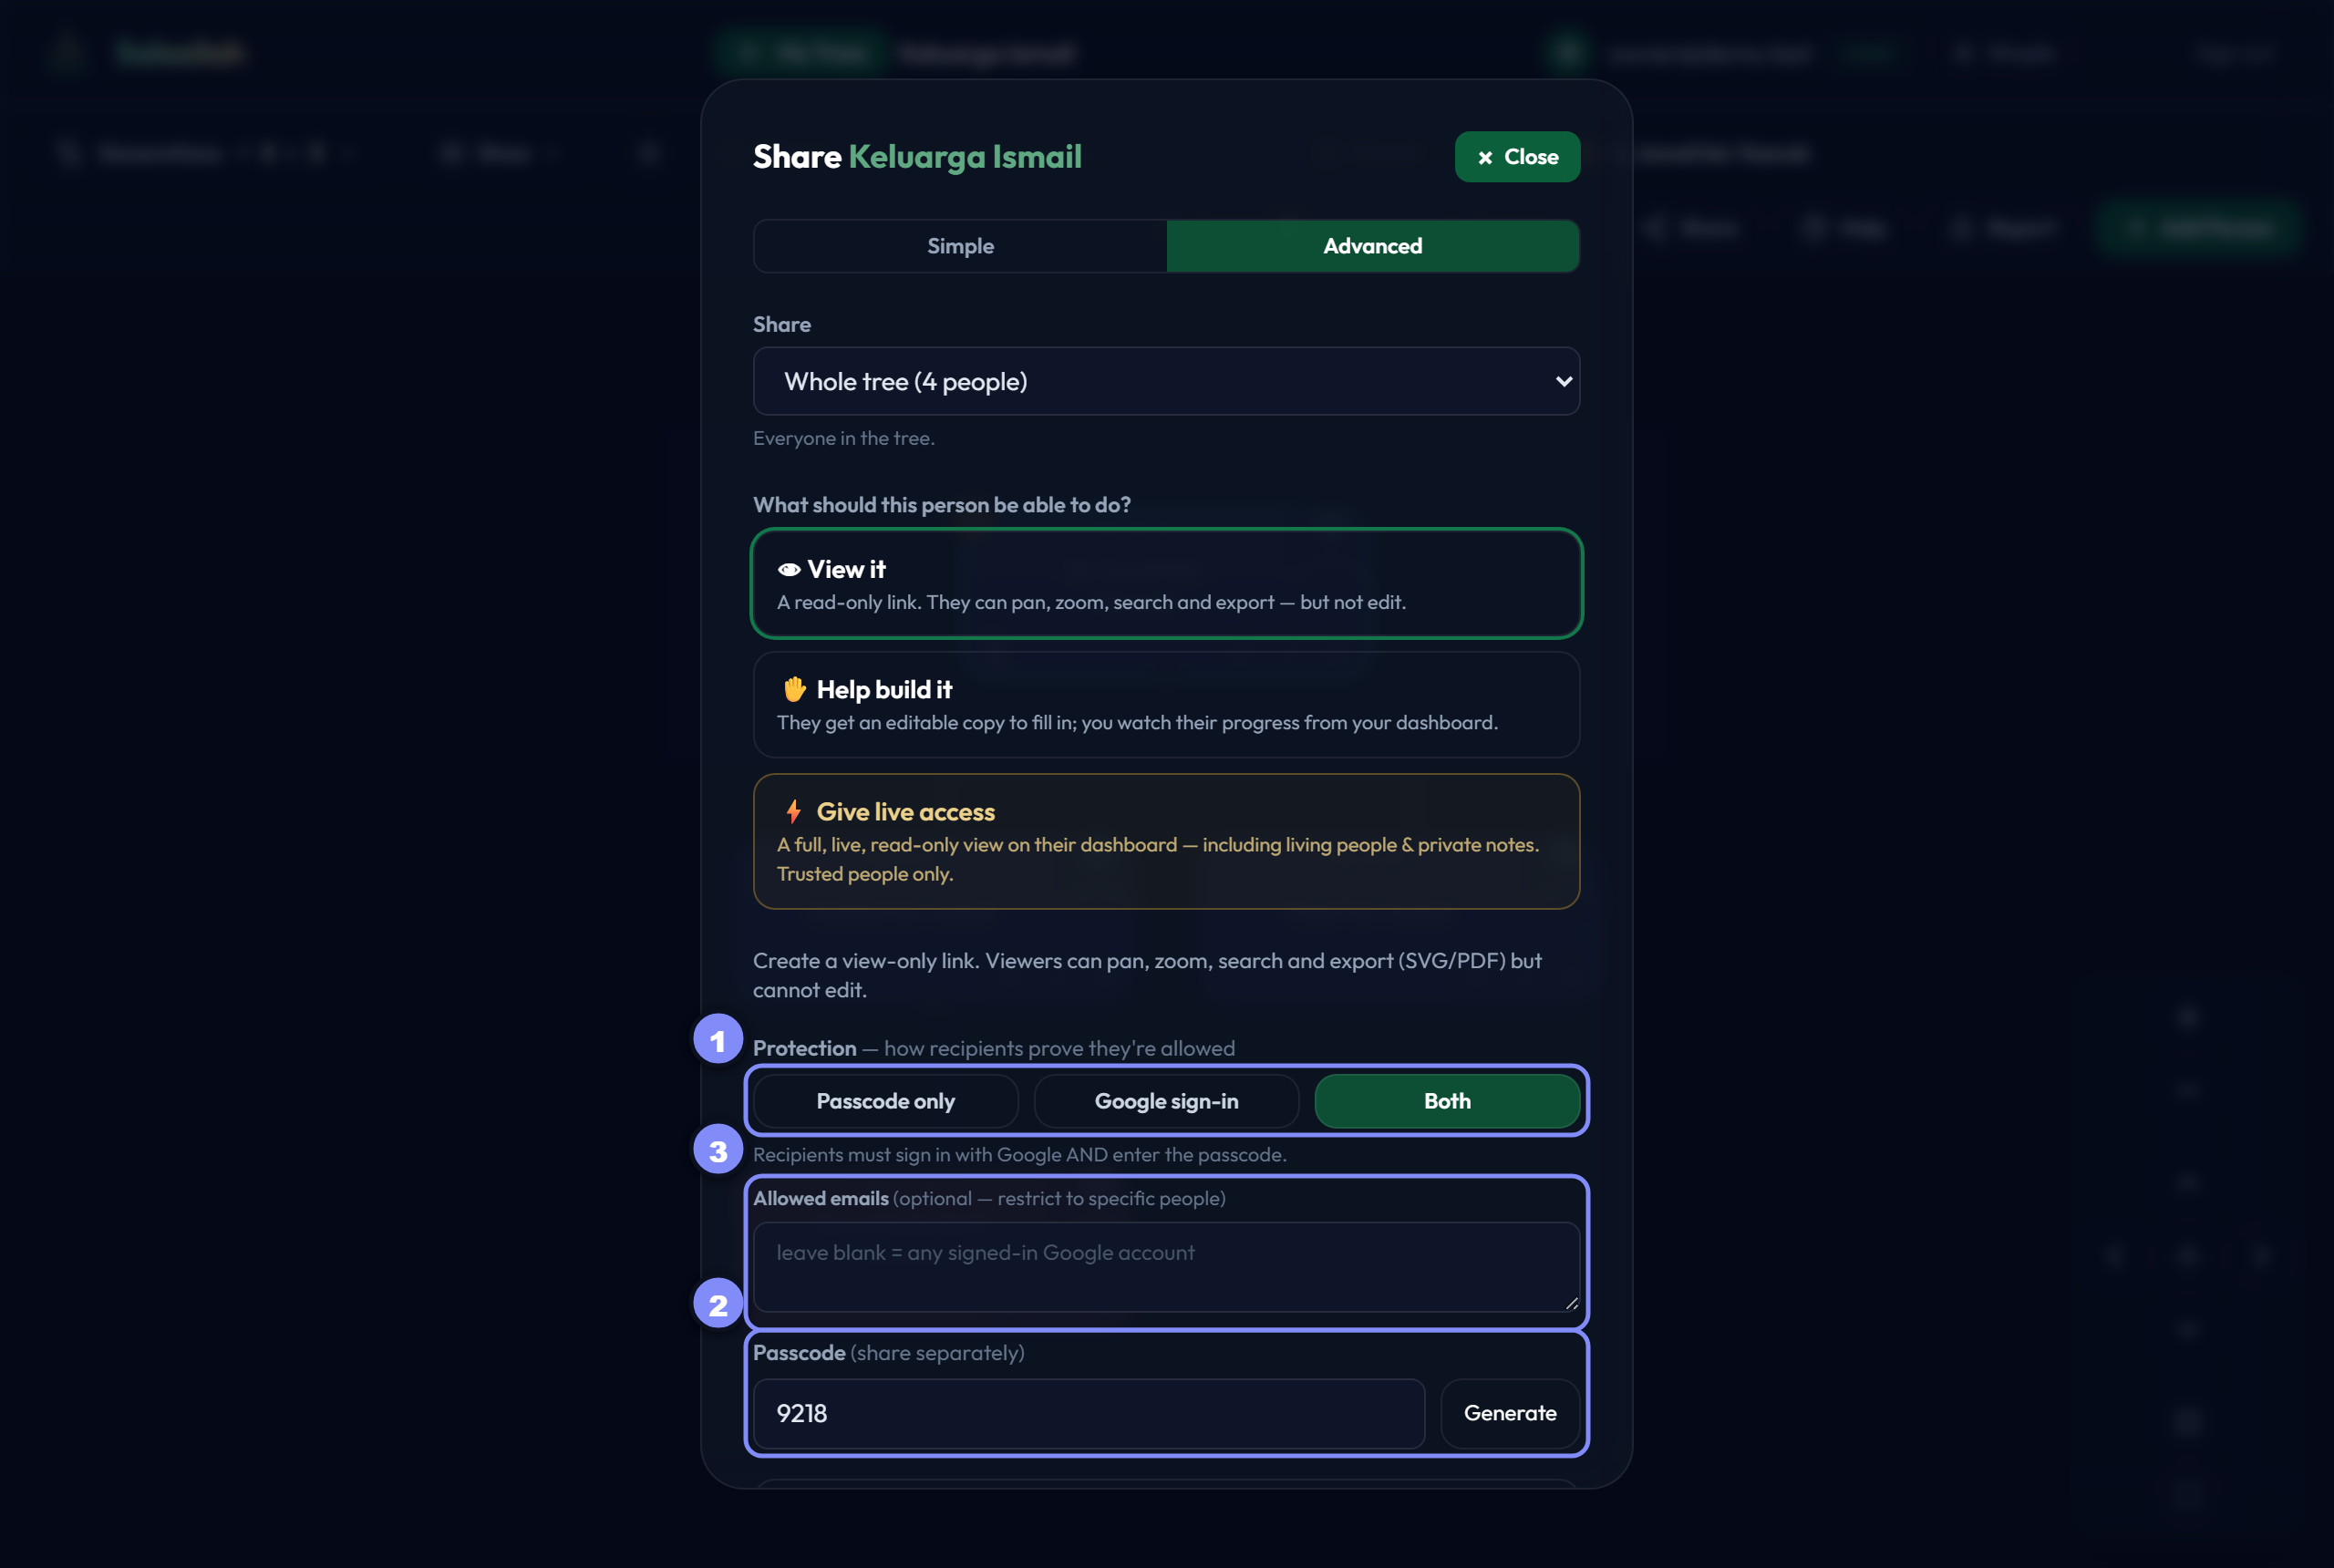
- Protection — Passcode only (good for relatives with no Google account), Google sign-in (nothing extra to send), or Both.
- Passcode — tap Generate for a 4-digit code. Send it separately from the link, not in the same message.
- Allowed emails — with Google sign-in you can list specific people, so a forwarded link still won't open for anyone else.
Label it and set an expiryOwner
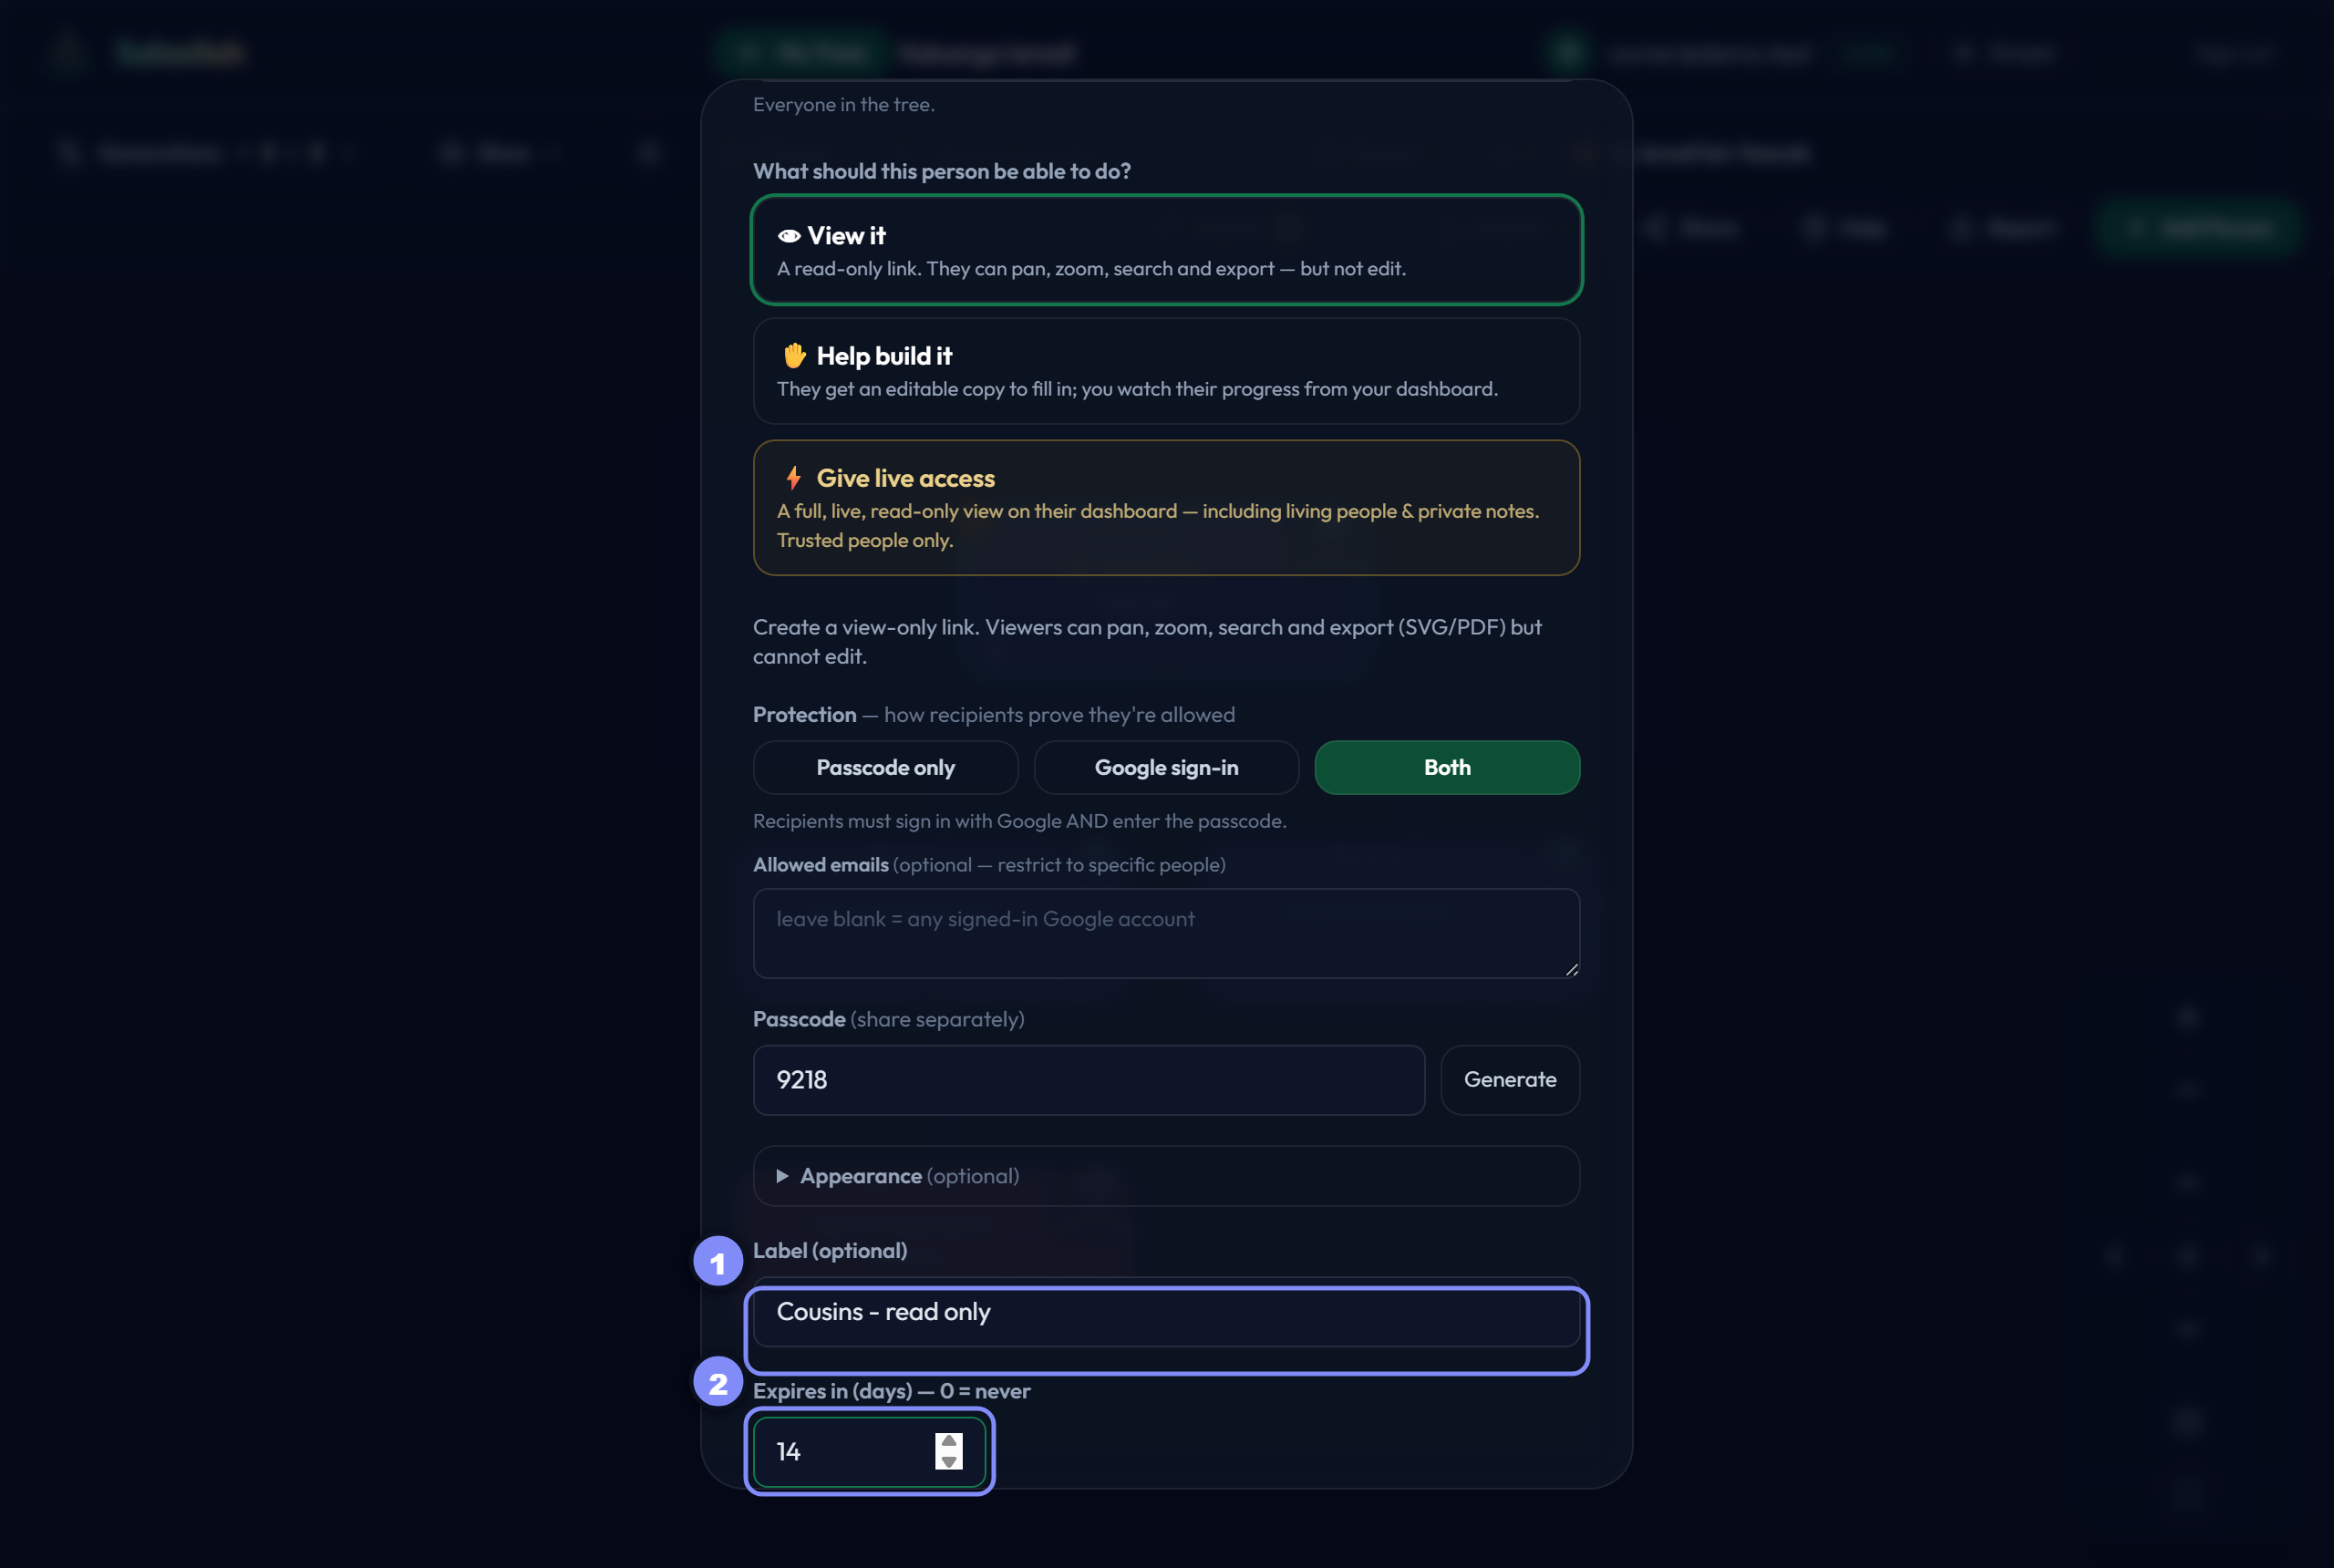
- Label — a note to yourself, like "Cousins — read only". In six months this is how you'll know what you handed out and to whom.
- Expires in (days) — 7 by default, or 0 for never. A short expiry is the cheapest safety net there is.
Send the passcode separatelyOwner
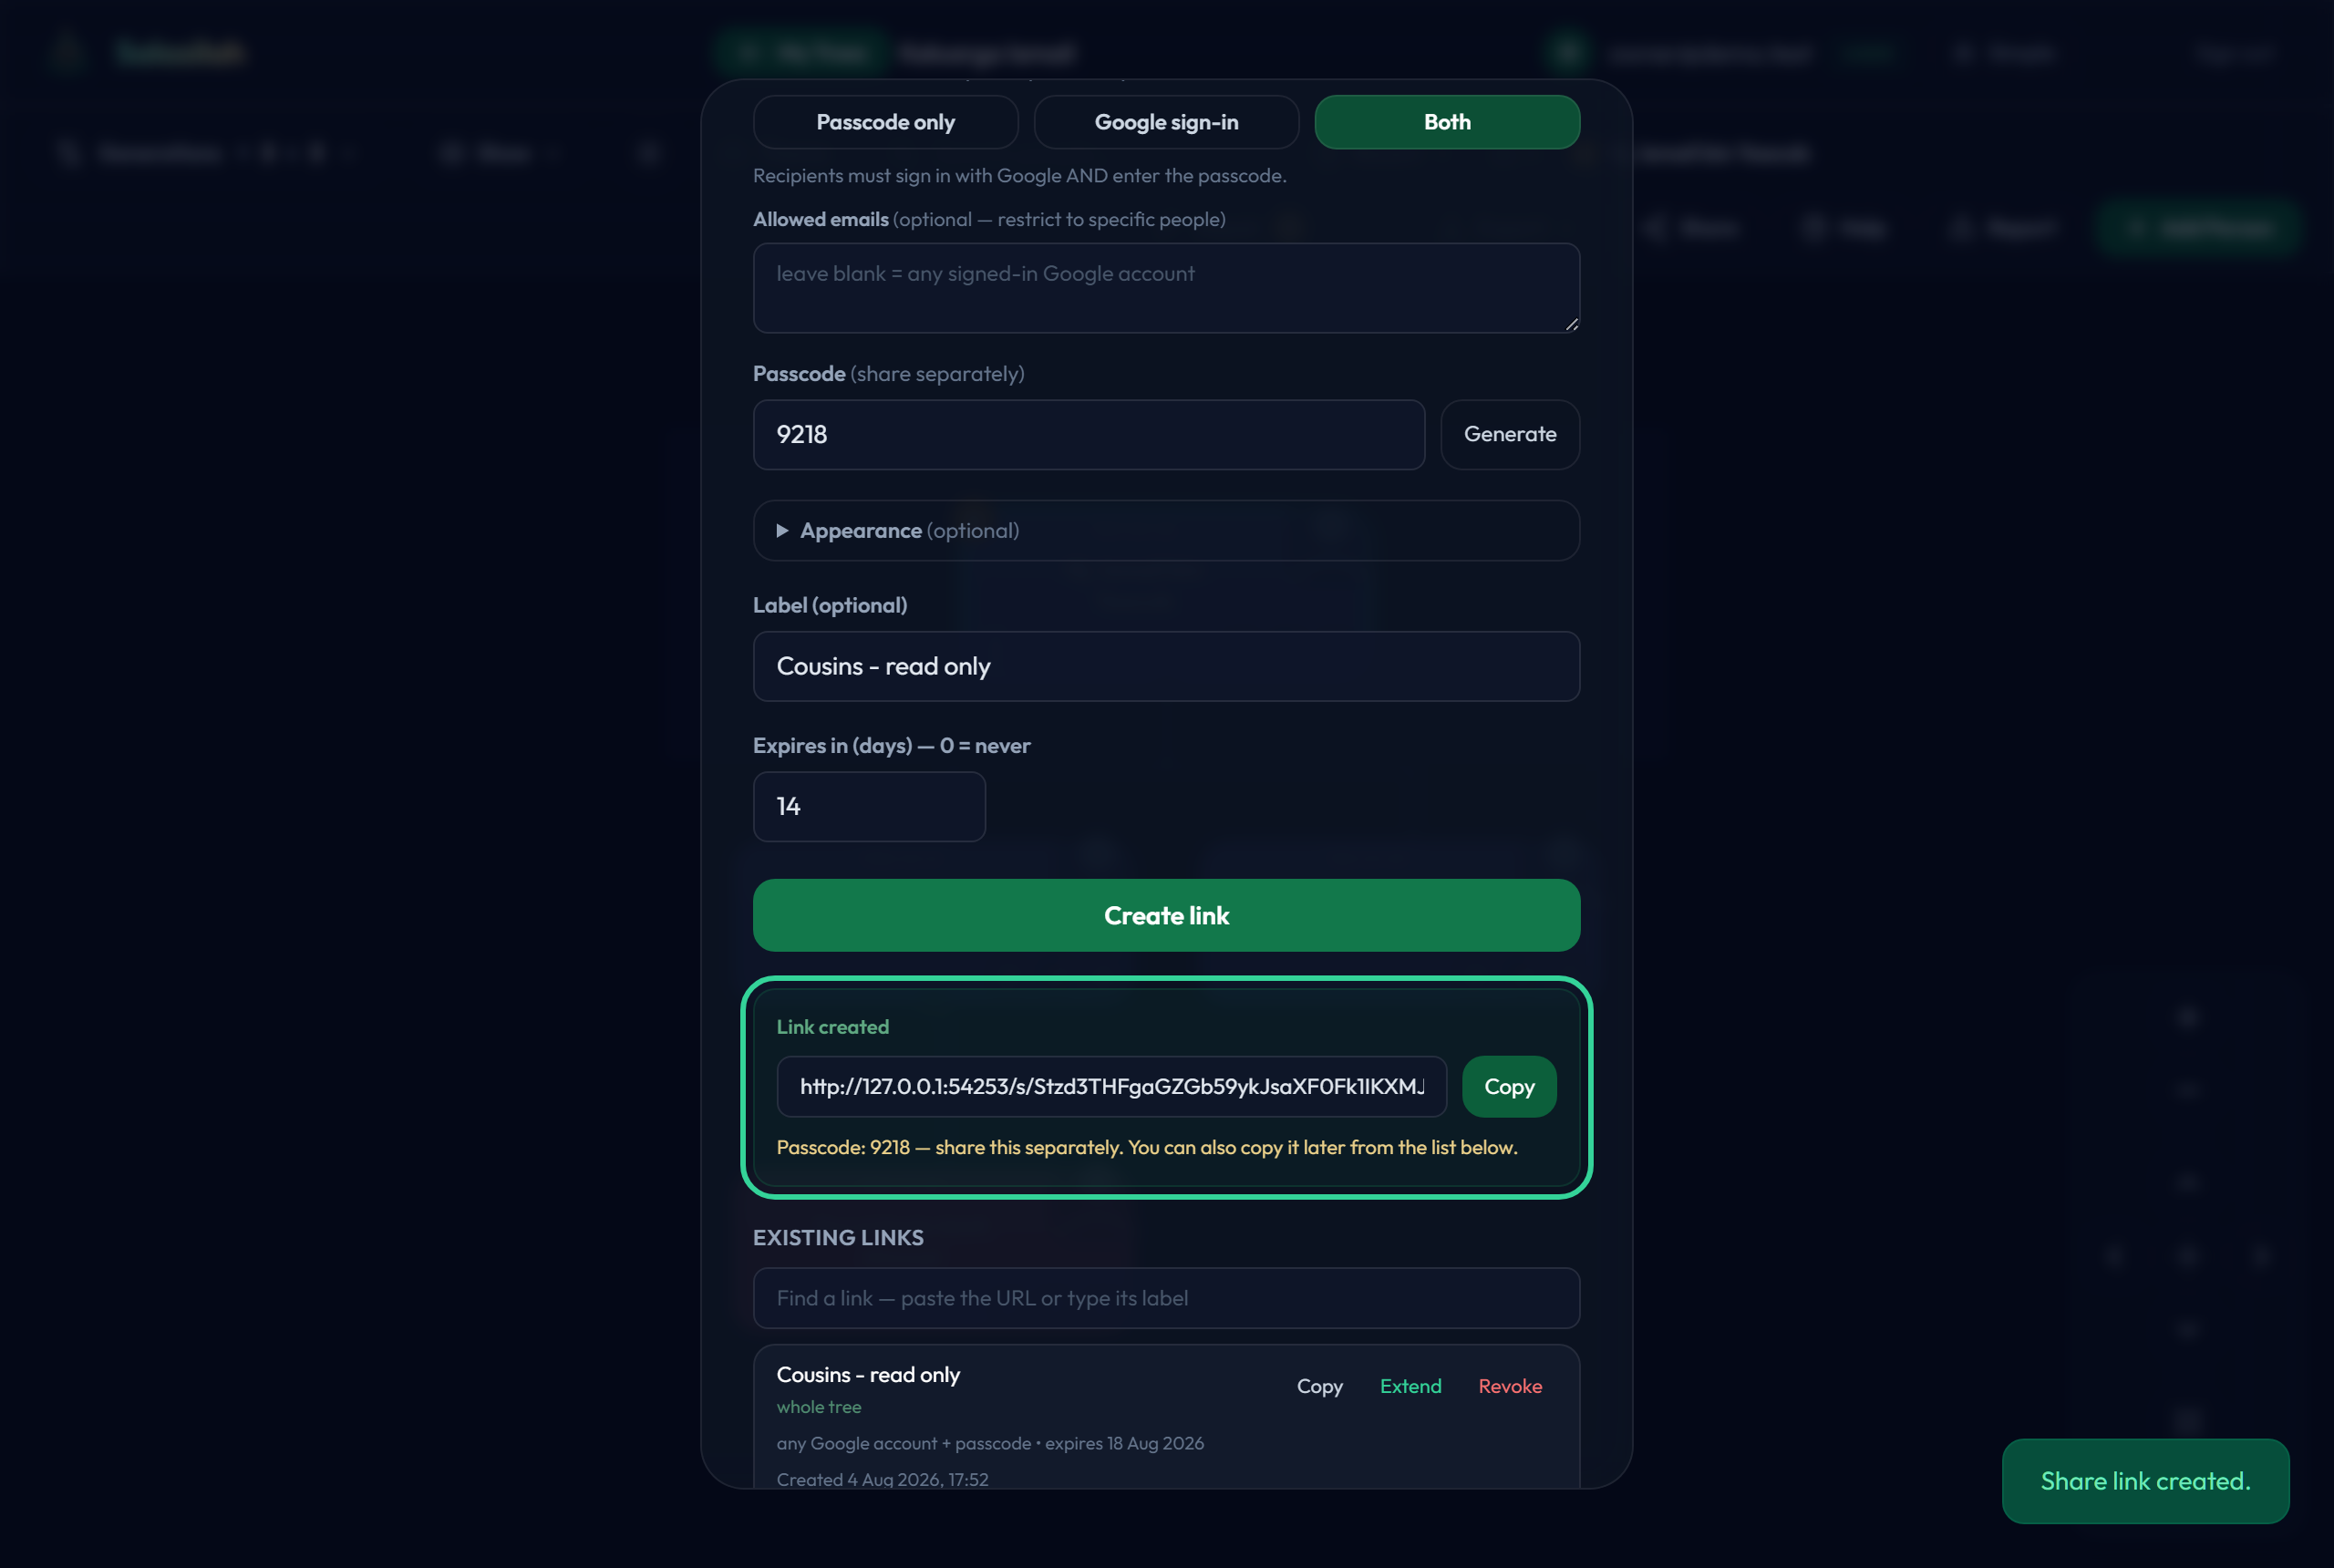
When you've set a passcode, it's shown with the new link — and you can copy it again later from the links list.
Give someone full live access
This one is differentOwner
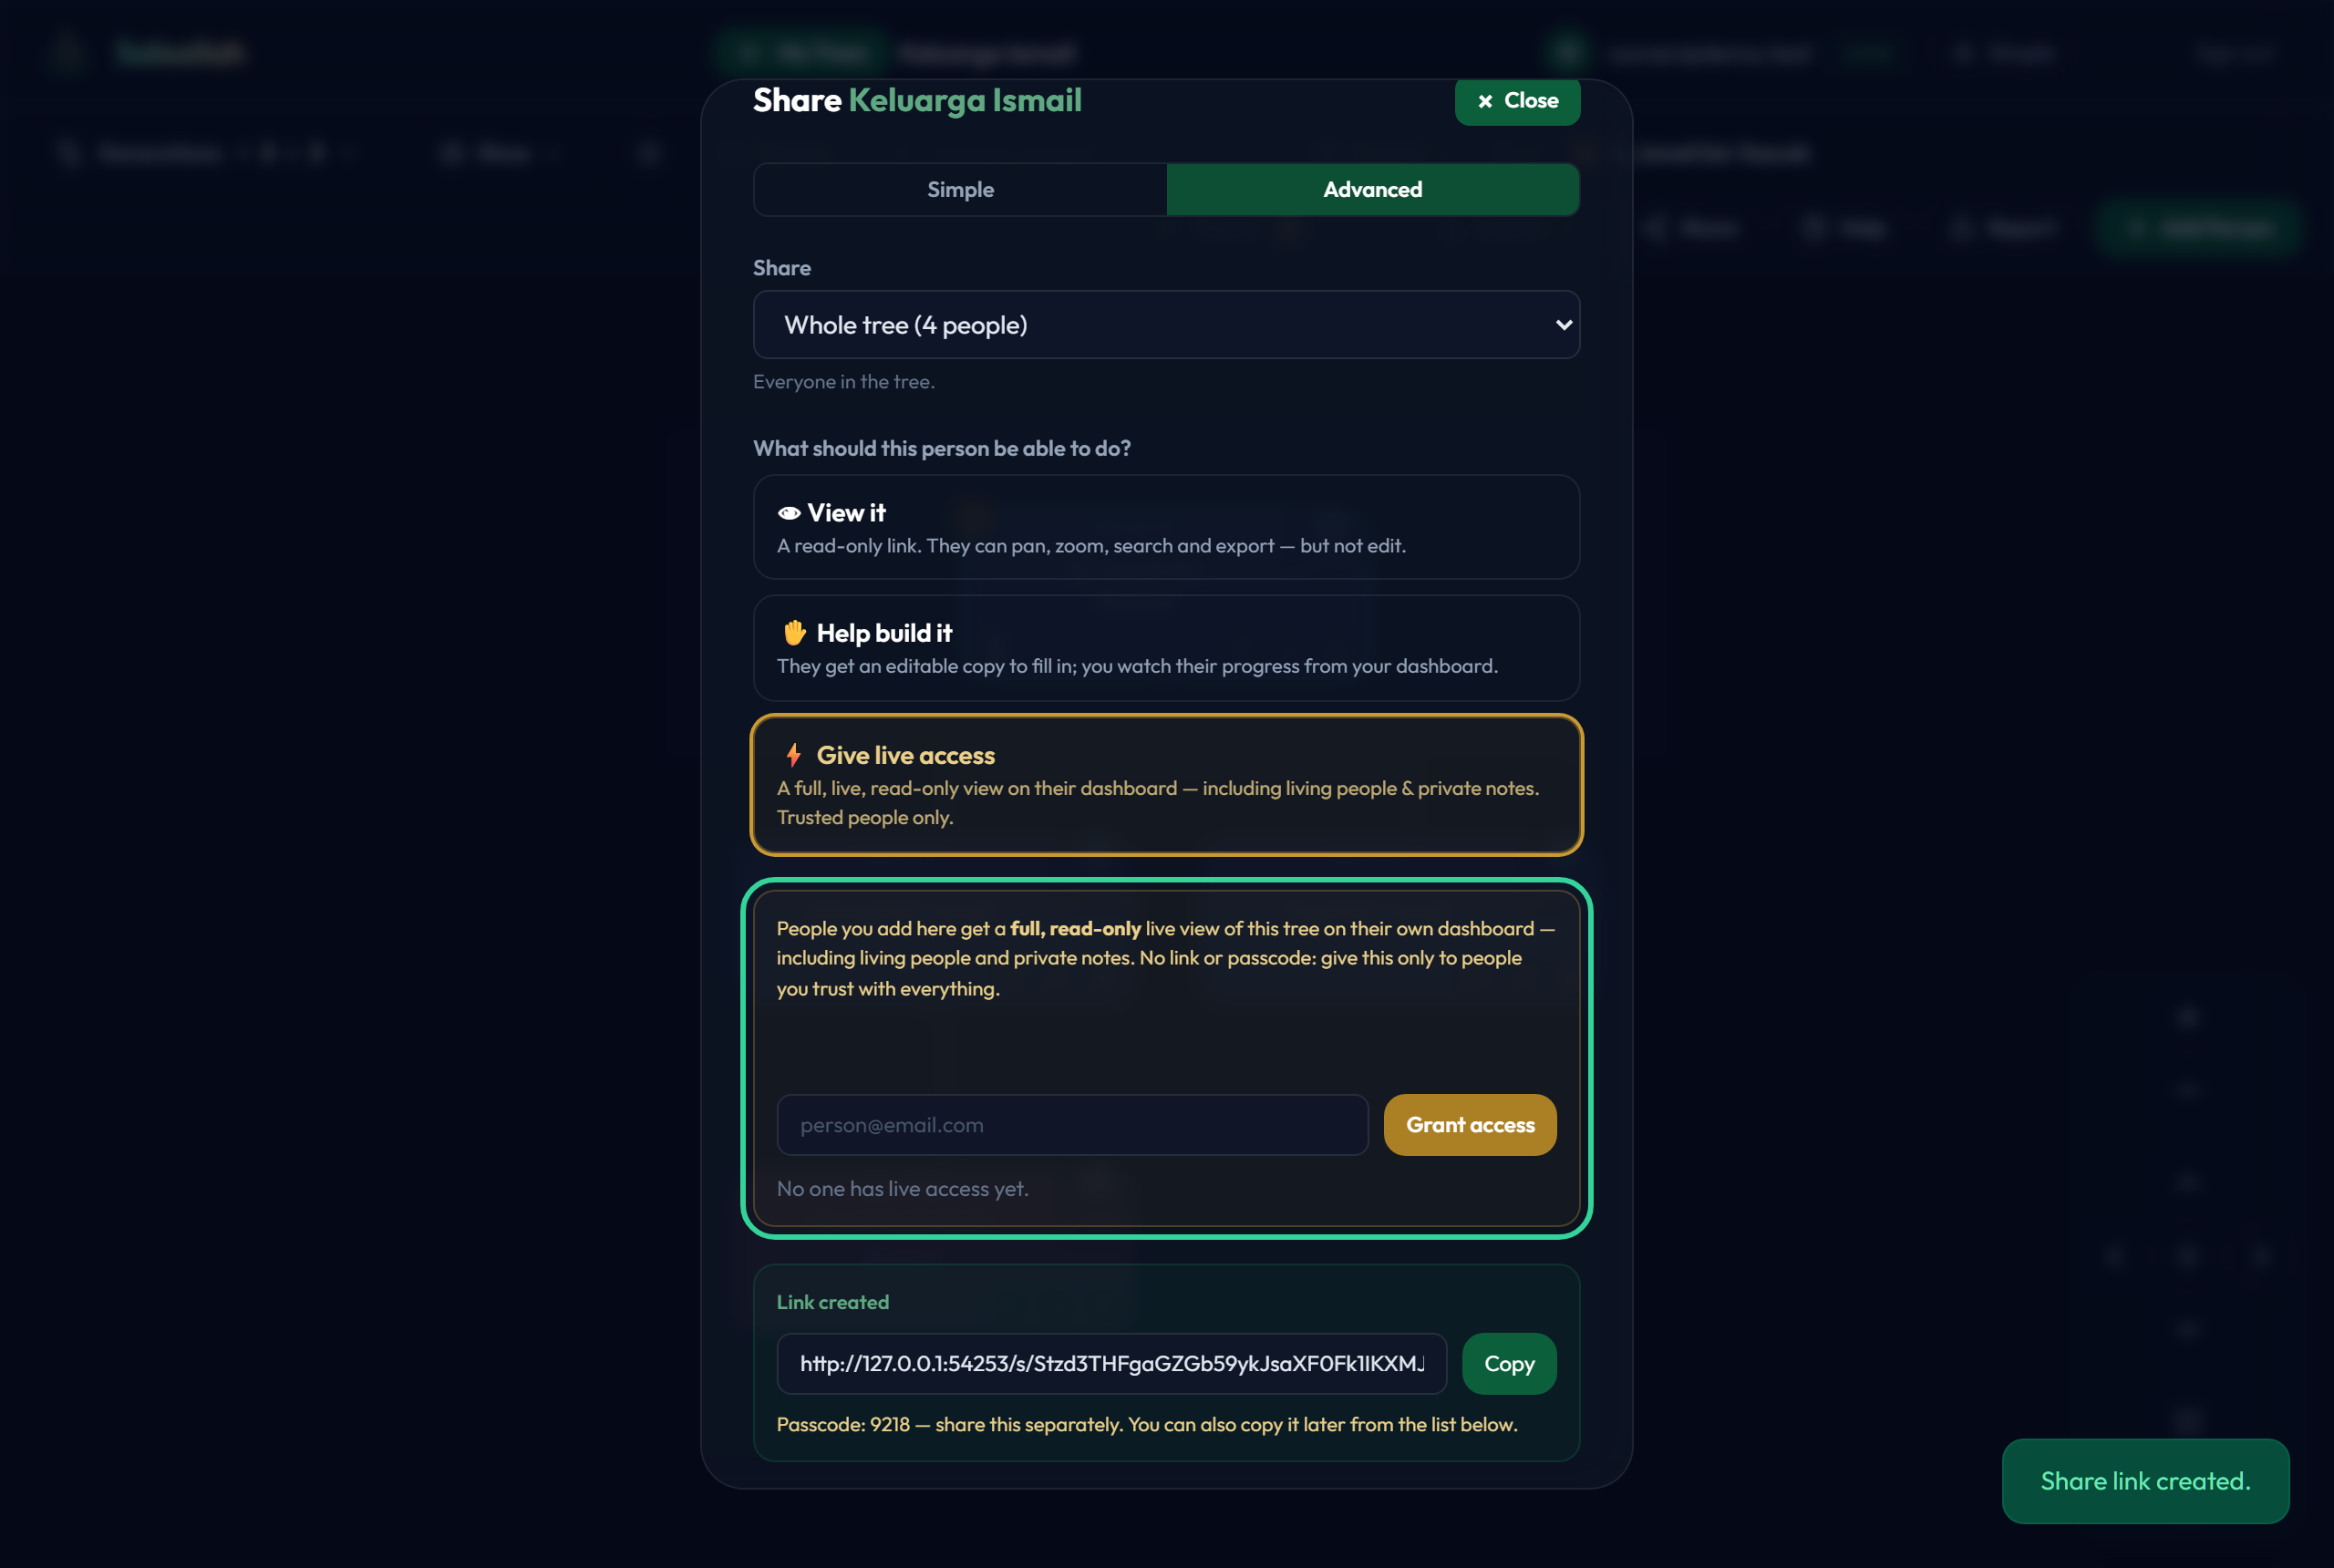
Everything else on this page is redacted. Live access is not. The person you name sees the whole tree exactly as you do — full names, living people's dates, private notes — live, on their own dashboard, read-only.
Grant it by emailOwner
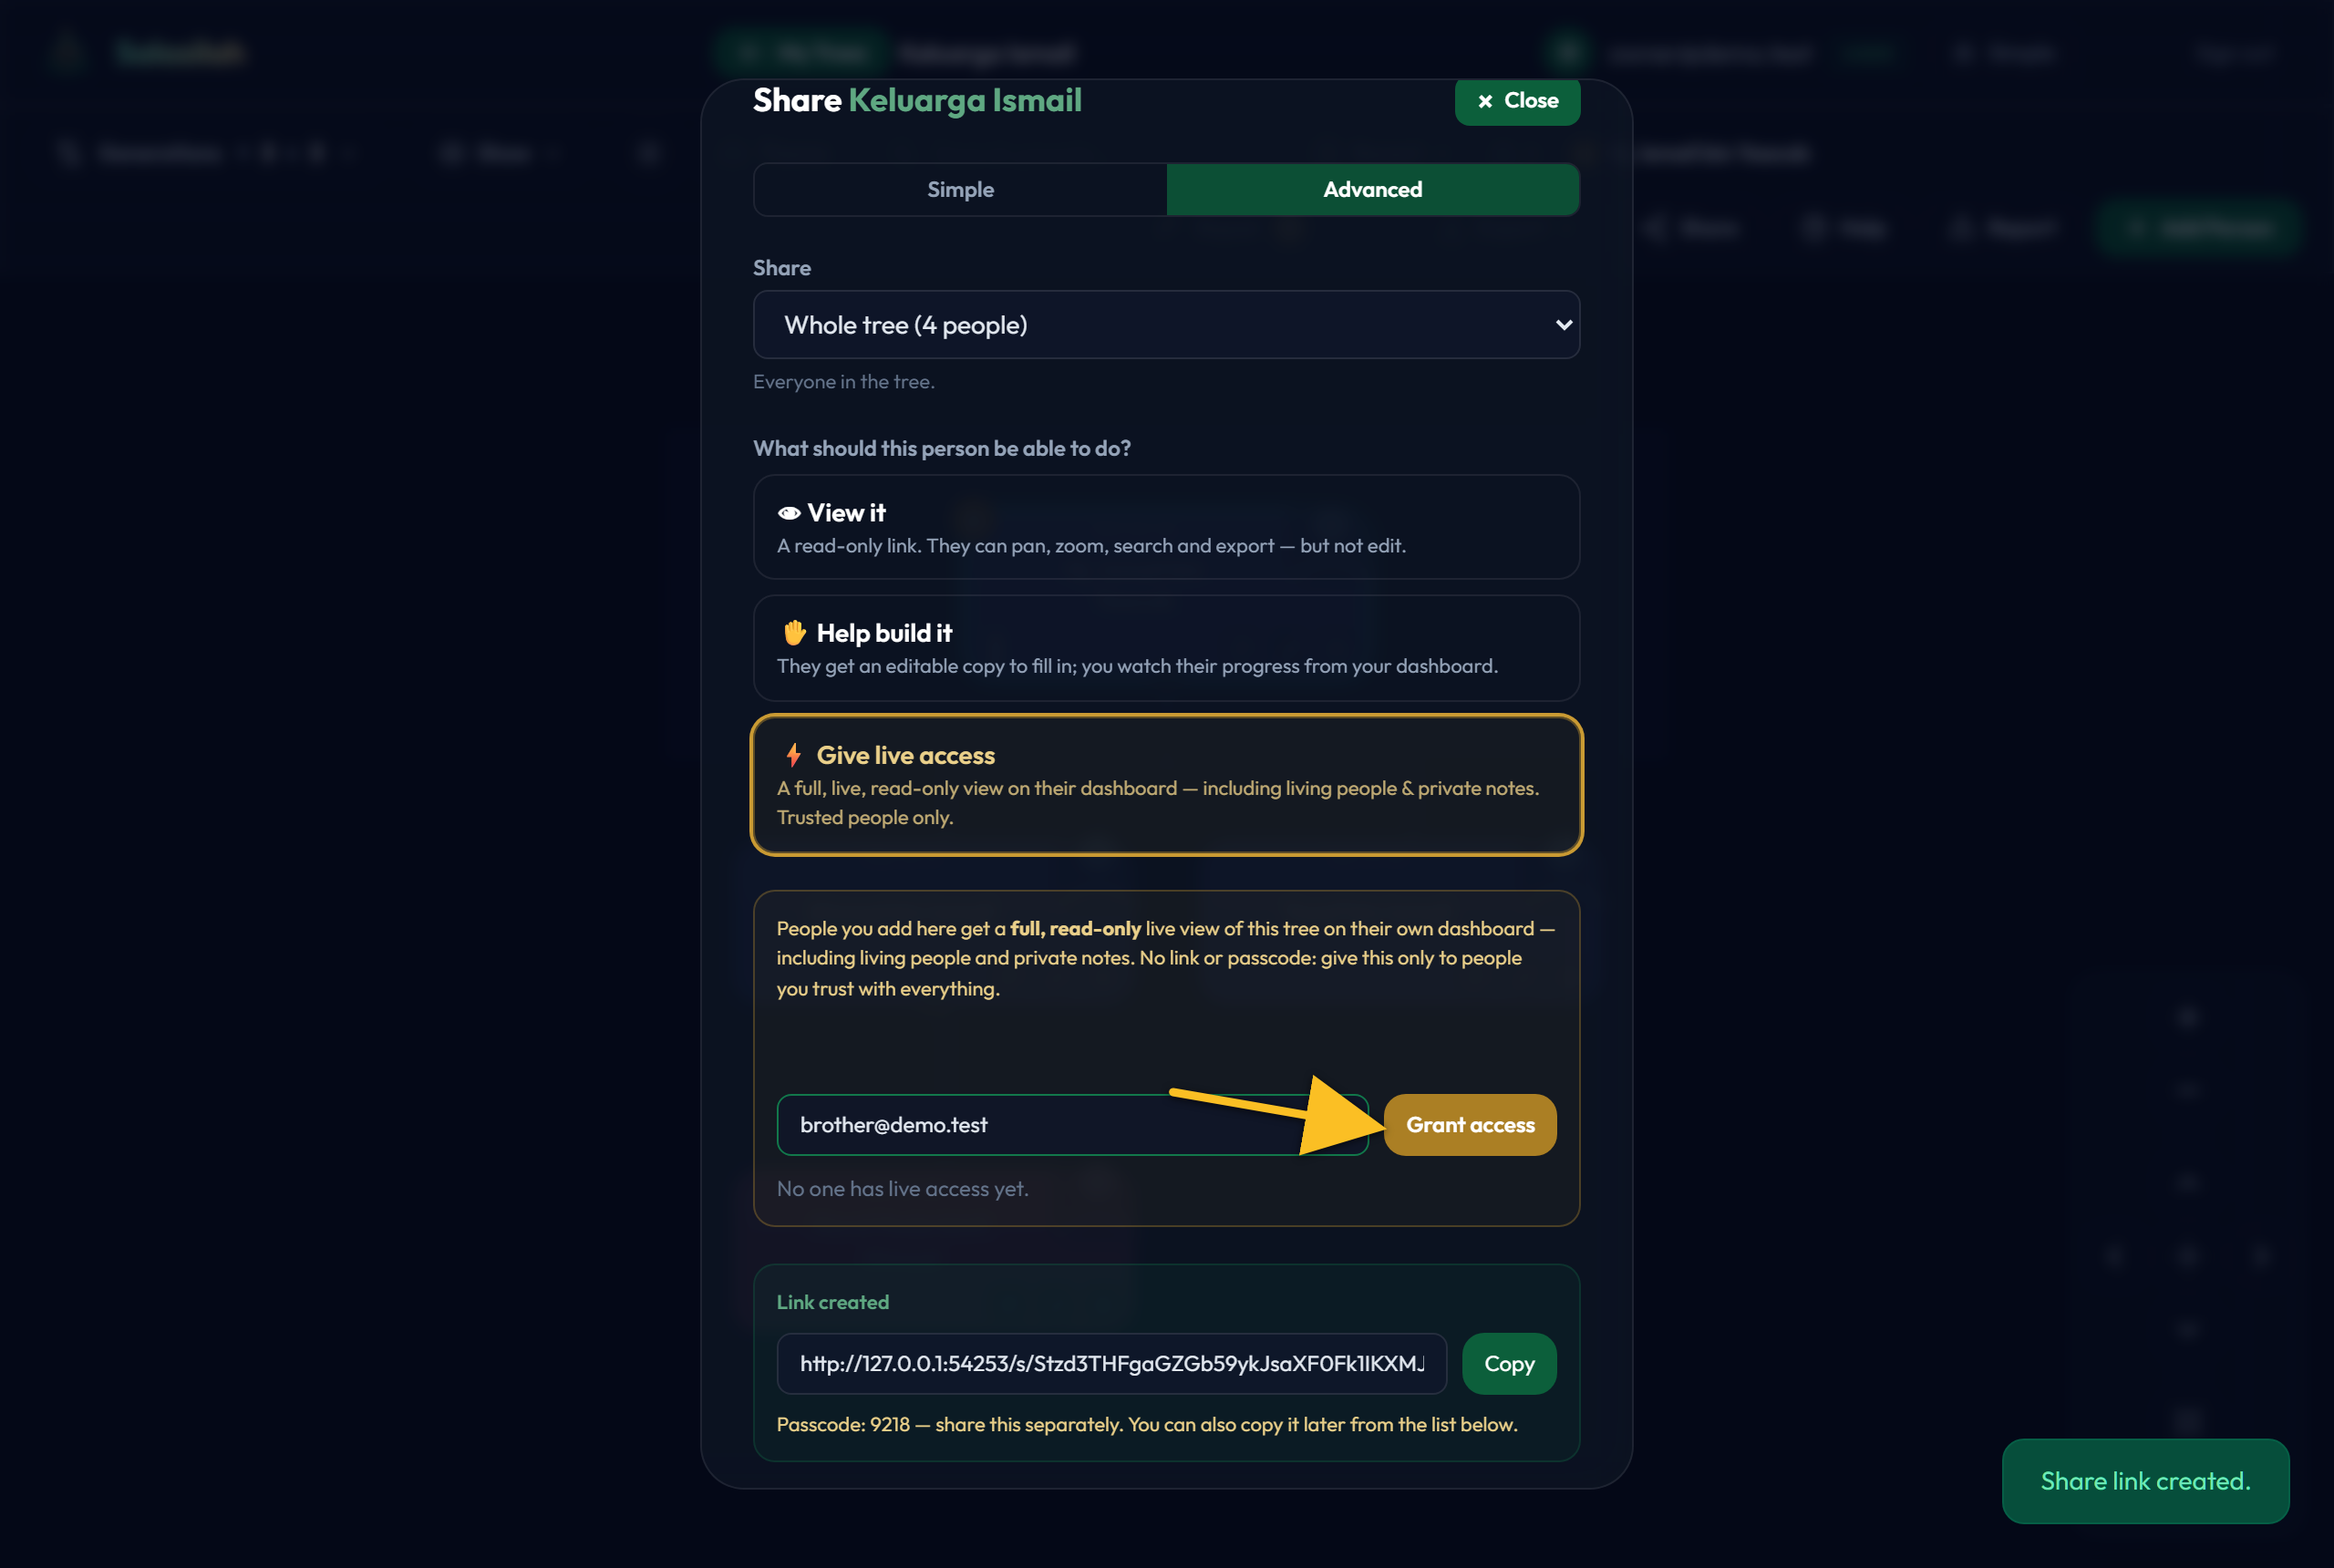
Type their email address and press Grant access. They don't need an account yet — the grant is keyed to the address and starts working the moment they sign up.
Everyone with live access is listedOwner
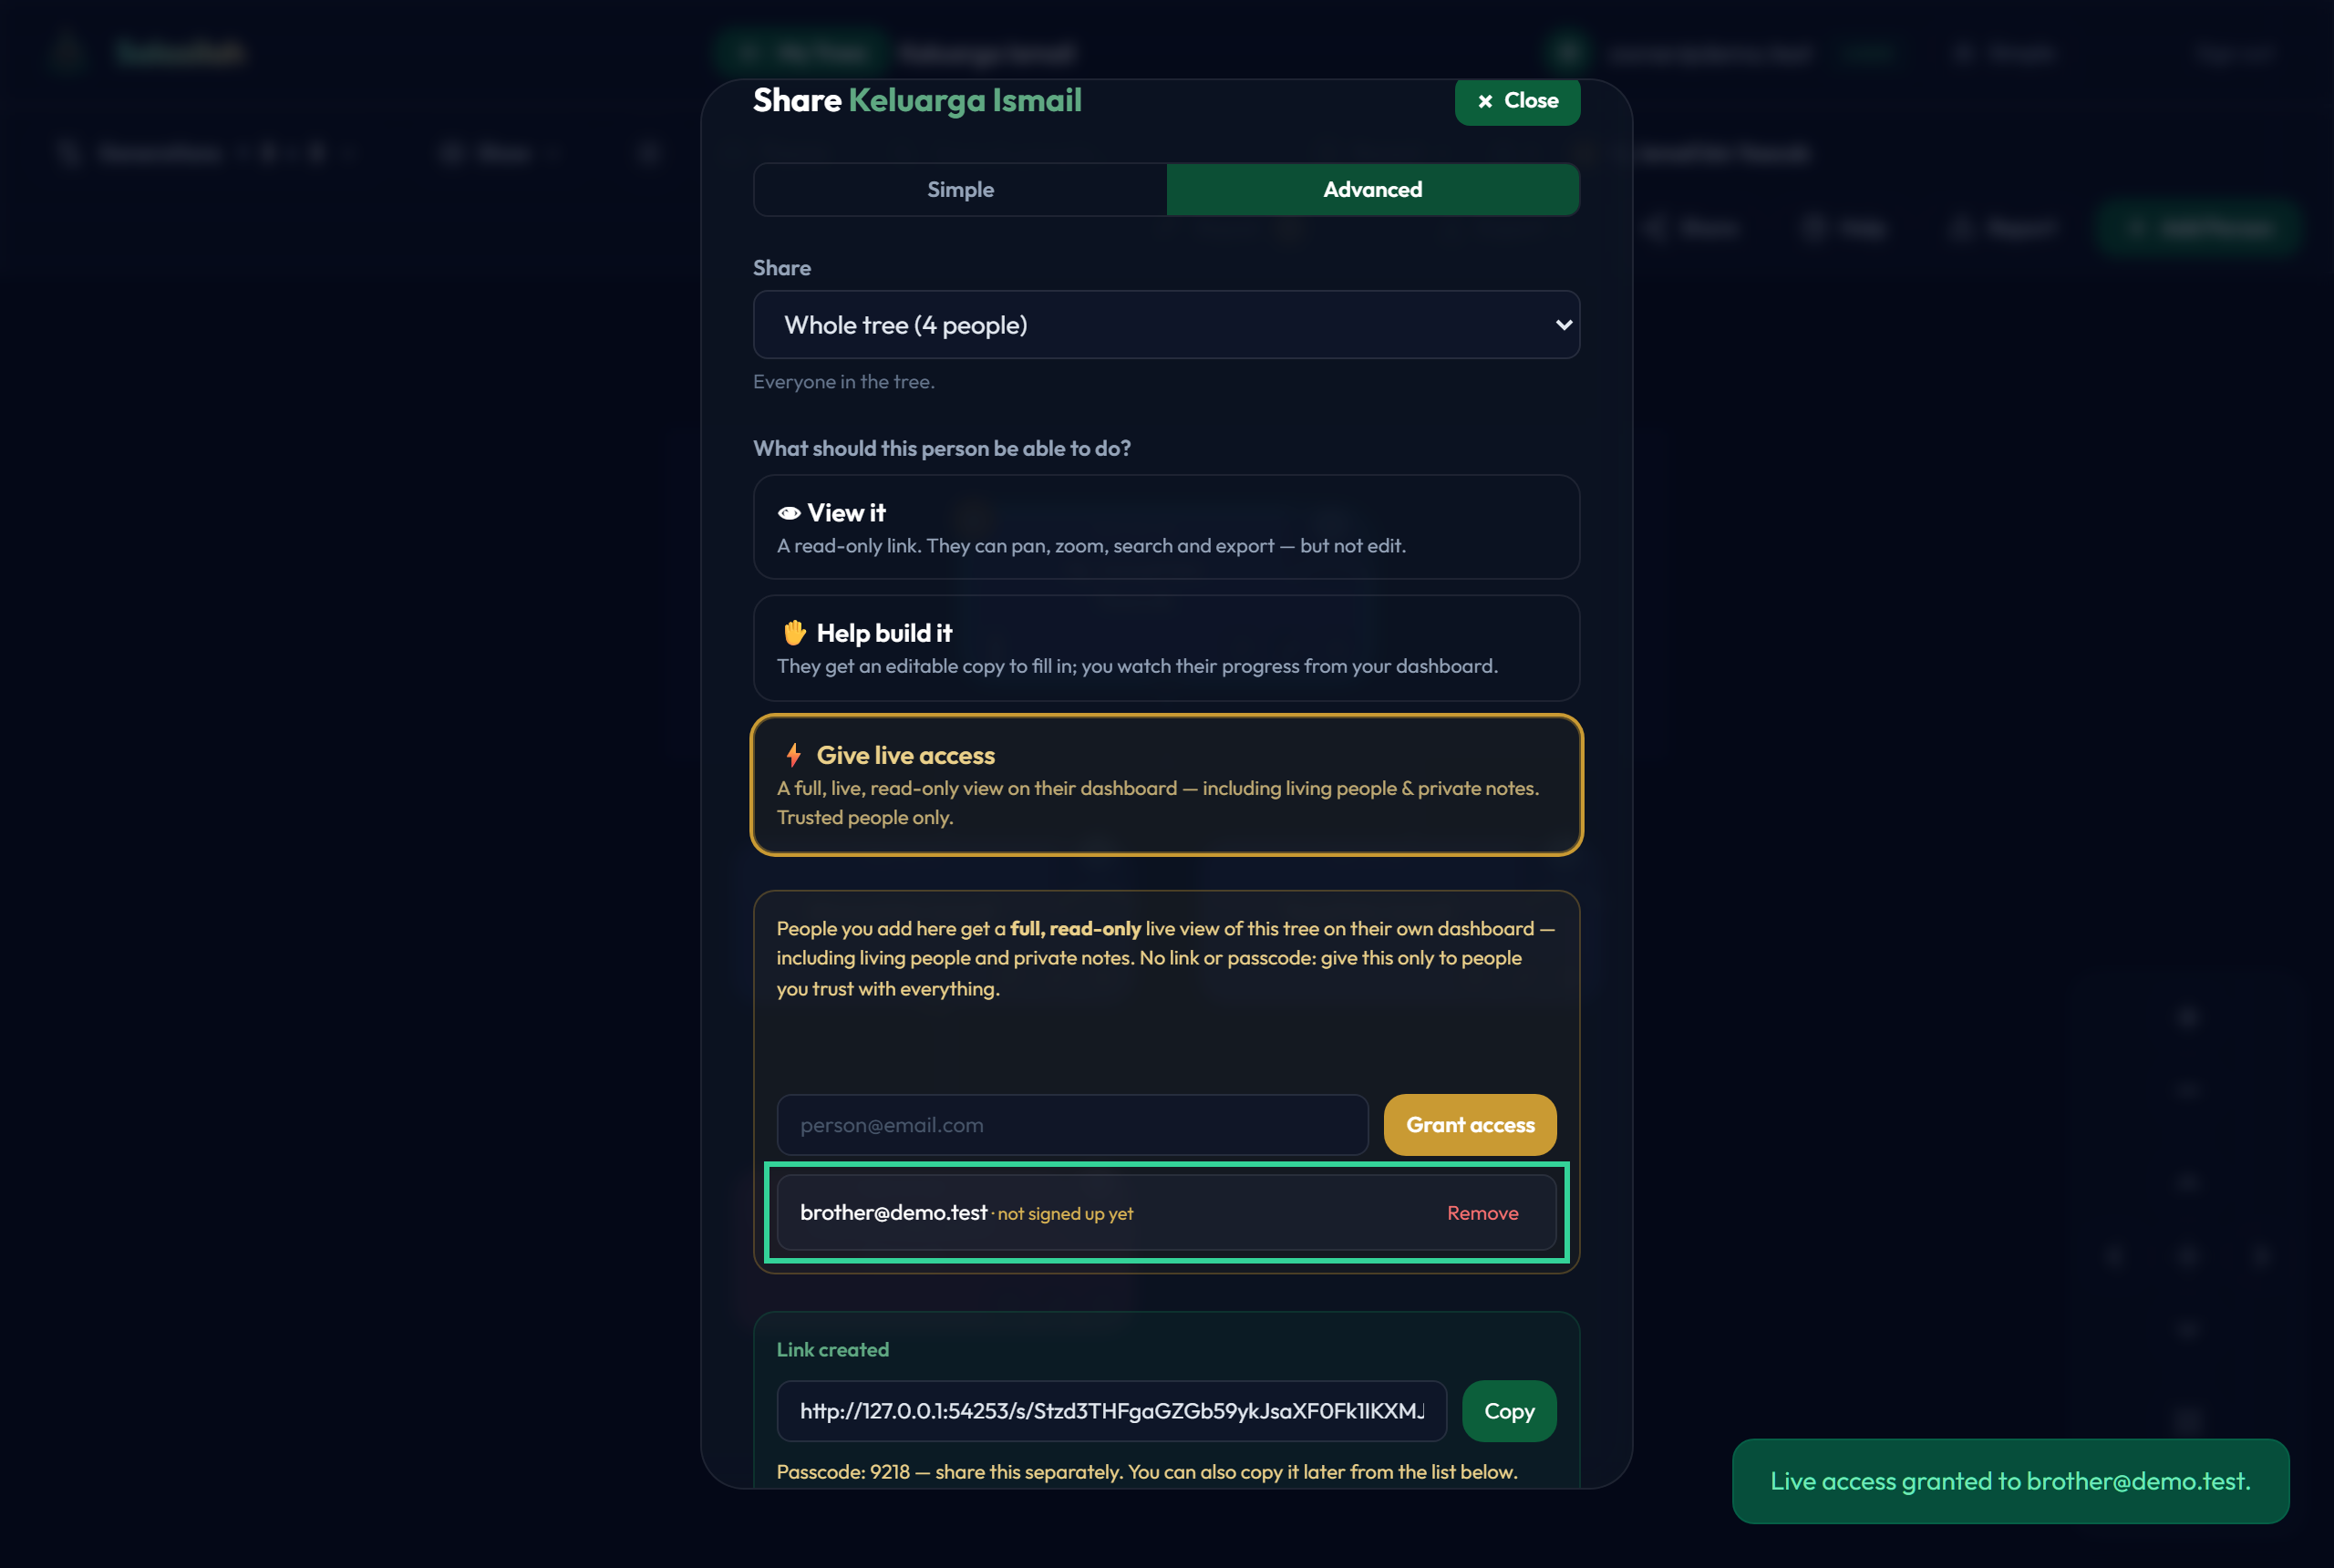
The panel lists who currently has live access, and lets you remove any of them. Removing takes effect immediately.
Managing what you have sent
Every link you've made is listedOwner
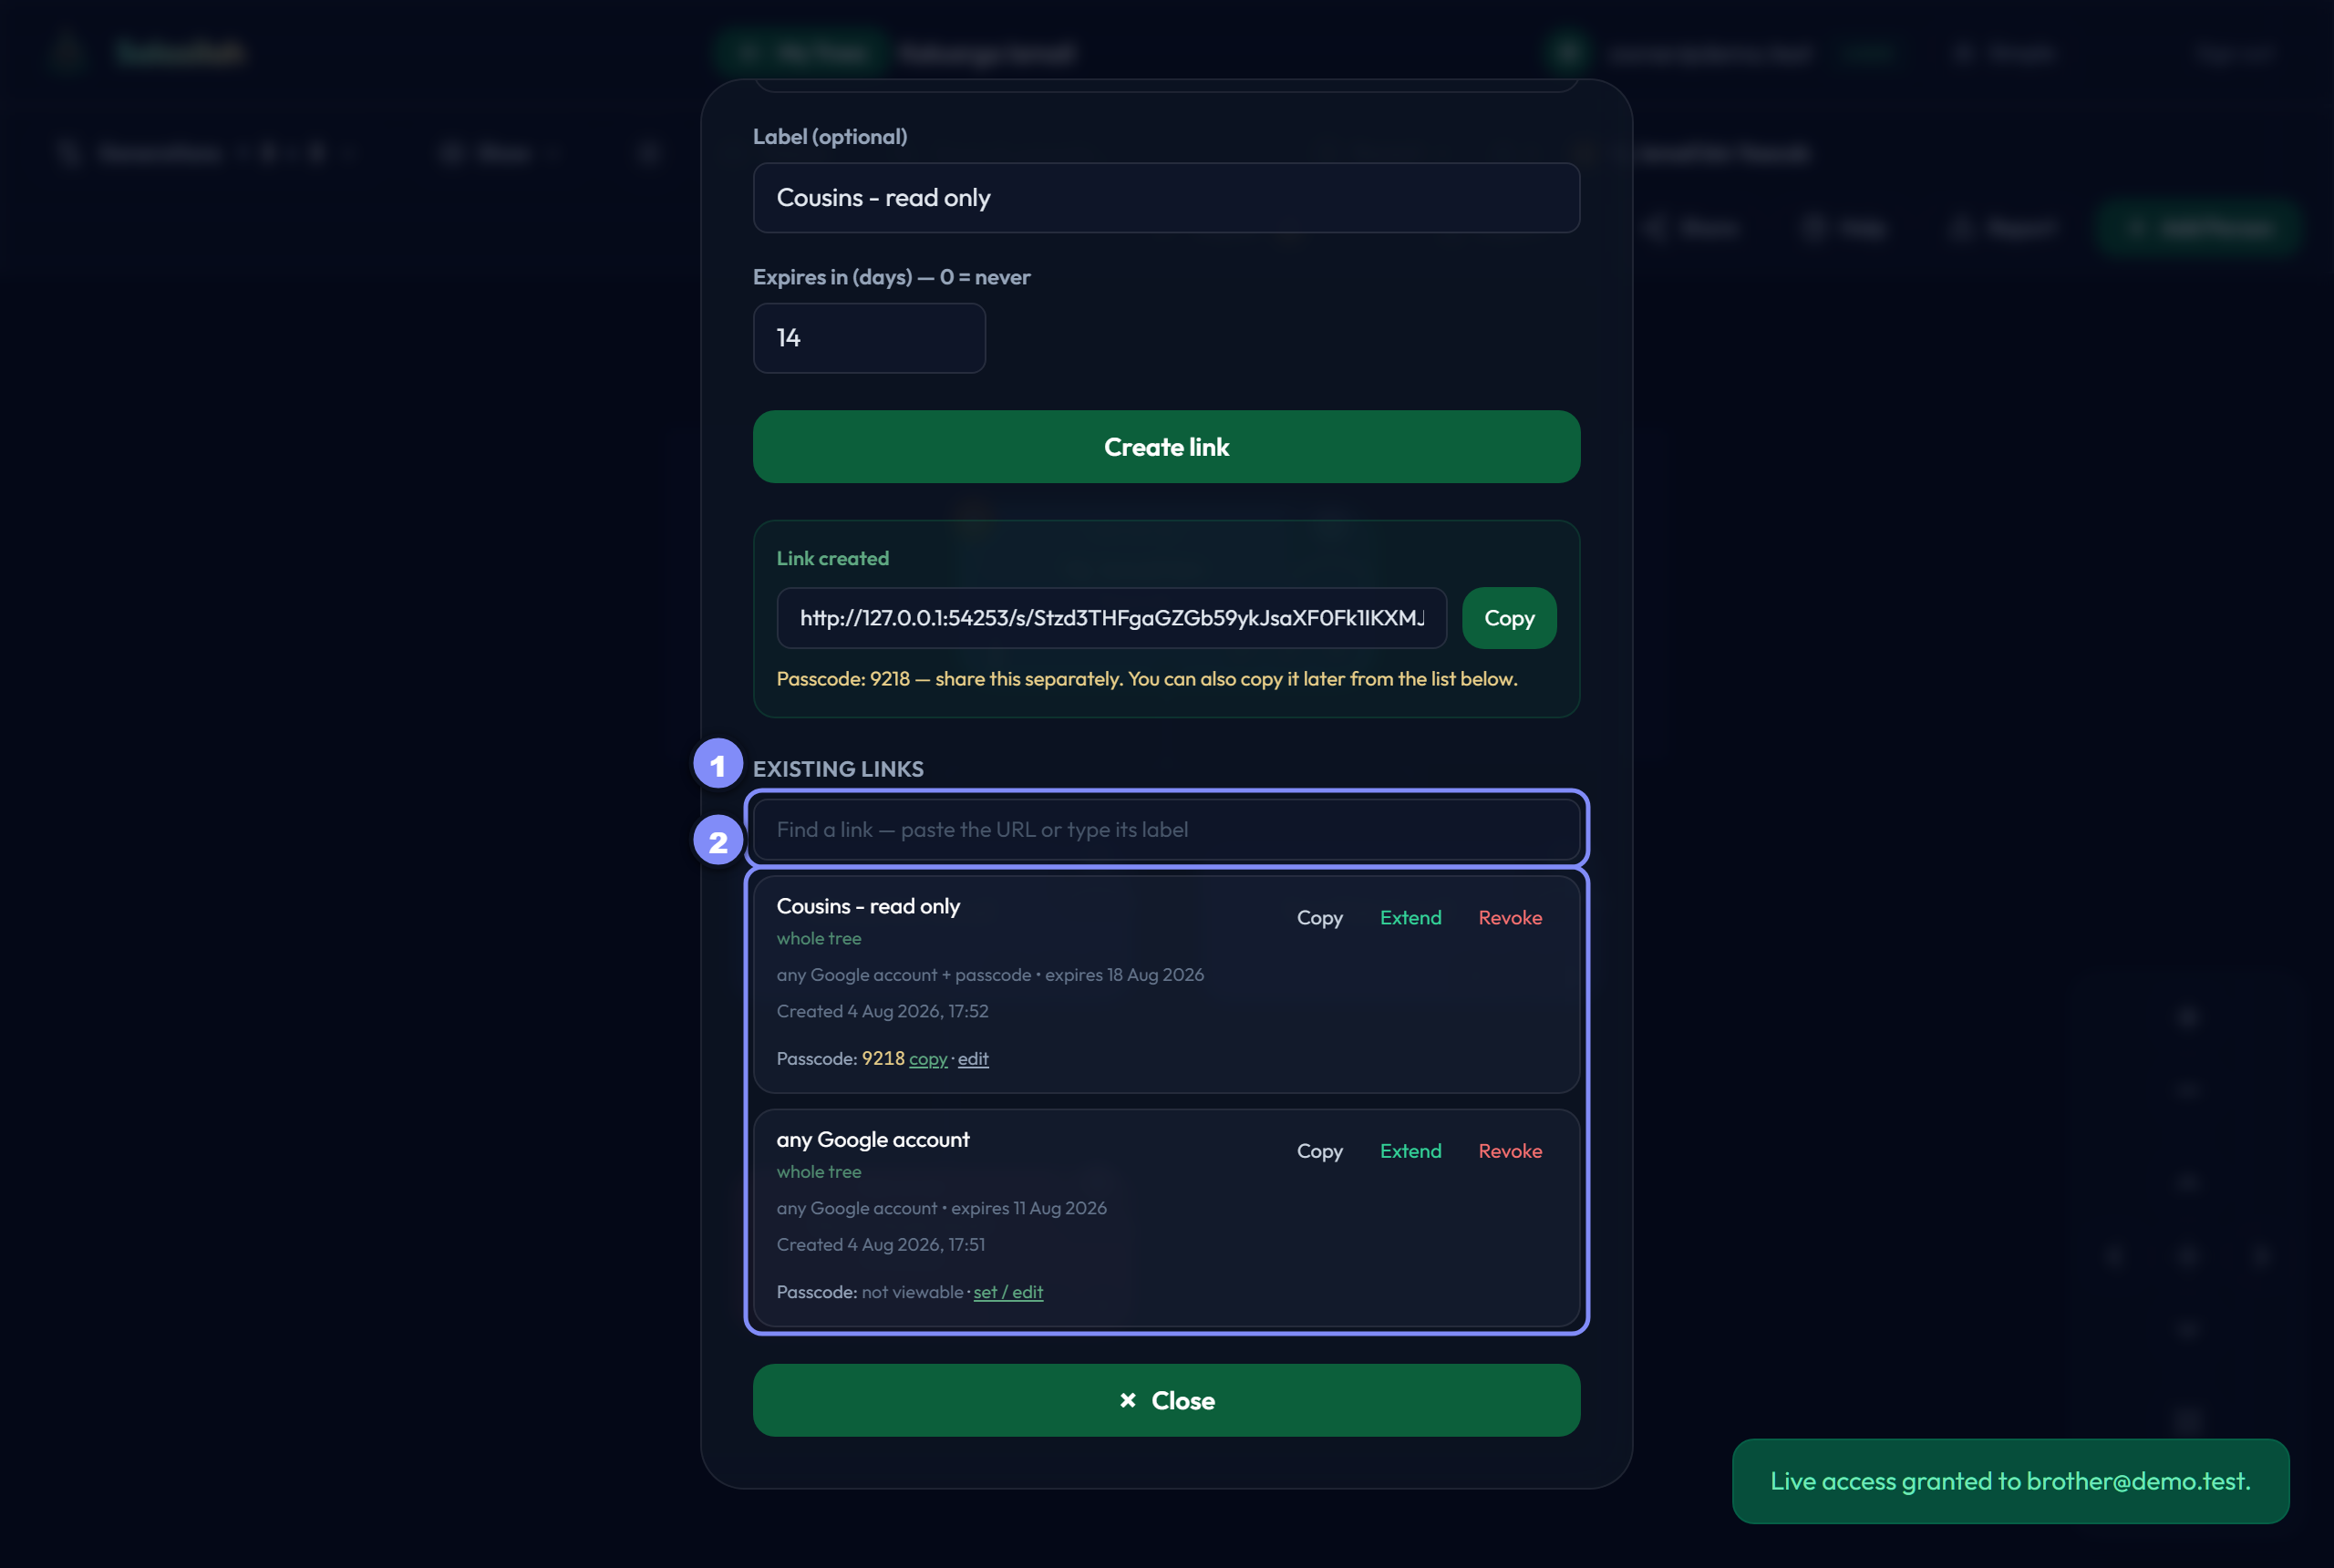
- Search — paste a URL or type a label to find one link among many.
- Each link shows its label, its scope, how it's protected, when it expires and when you made it — with Copy, Extend and Revoke beside it.
The next three steps take those three buttons in turn. Nothing here is destructive except Revoke, which asks first.
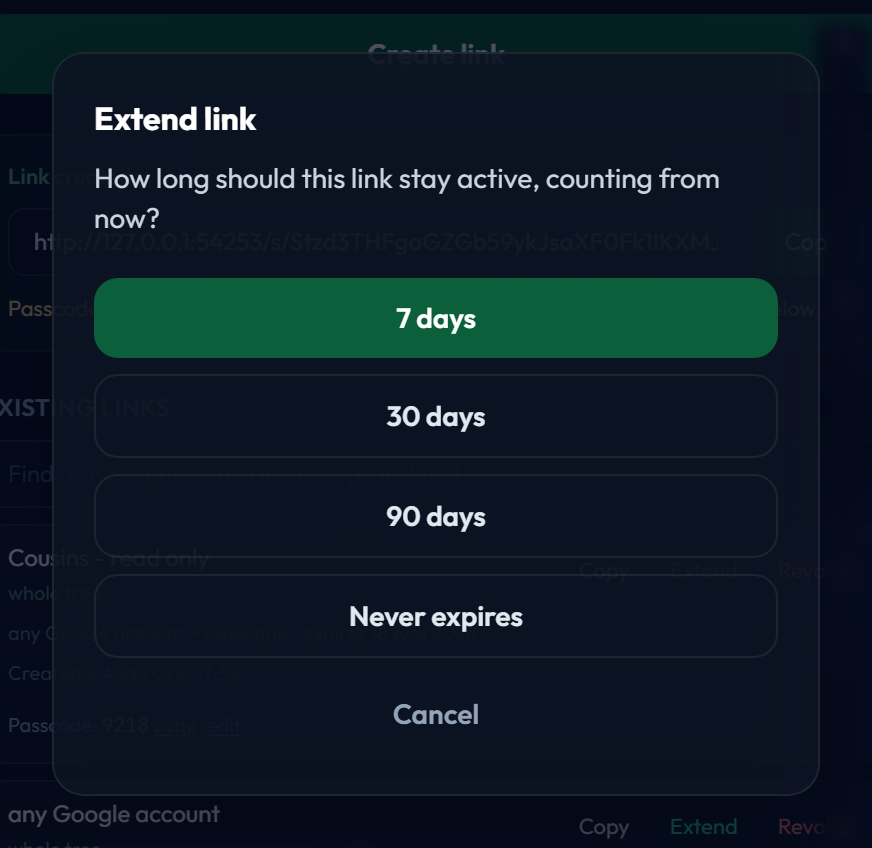
Extend a link, or stop it expiringOwner
Press Extend and pick how long it should stay active counting from now — not from when you made it. Never expires is there for the link you keep in the family group chat.
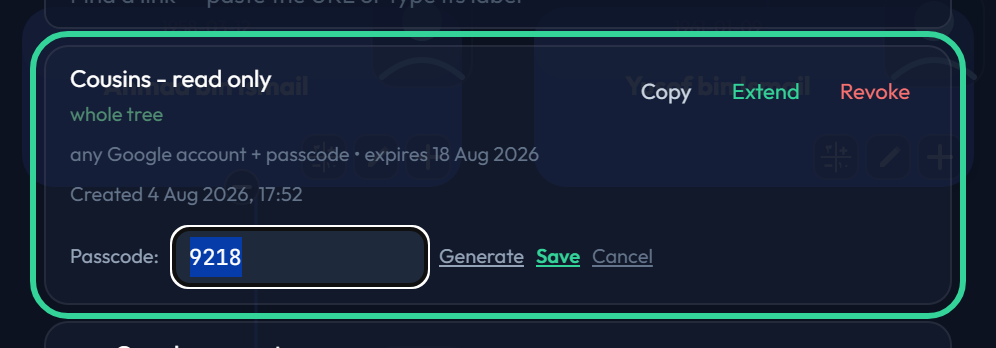
Re-copy or change the passcodeOwner
The passcode is printed on the row, so if a relative lost it you can just copy it again — you do not need to make them a new link. edit turns the line into a box: type a new code or press Generate, then Save.
Changing it takes effect at once. Anyone still using the old code is locked out until you send them the new one, which is exactly what you want if a link went somewhere it should not have.
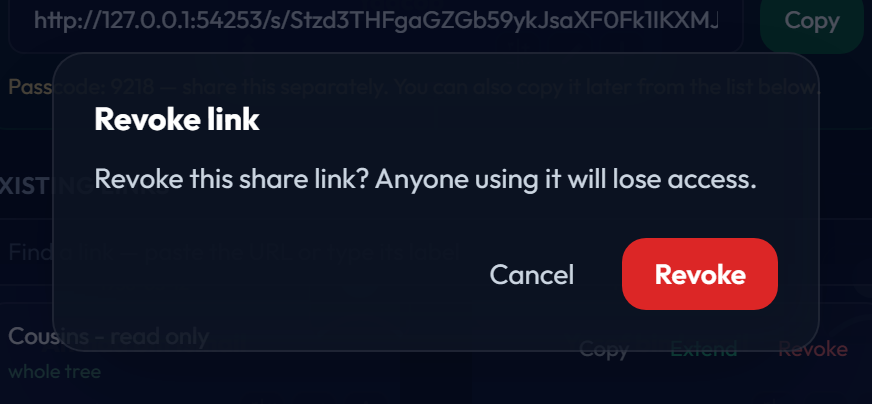
Revoke itOwner
Revoke kills the link immediately for everyone holding it — anyone with it open loses access on their next move. You are asked to confirm because it cannot be undone: there is no un-revoke, and a new link is a new URL.
Nothing about your tree changes. Revoking removes the way in, not any data.
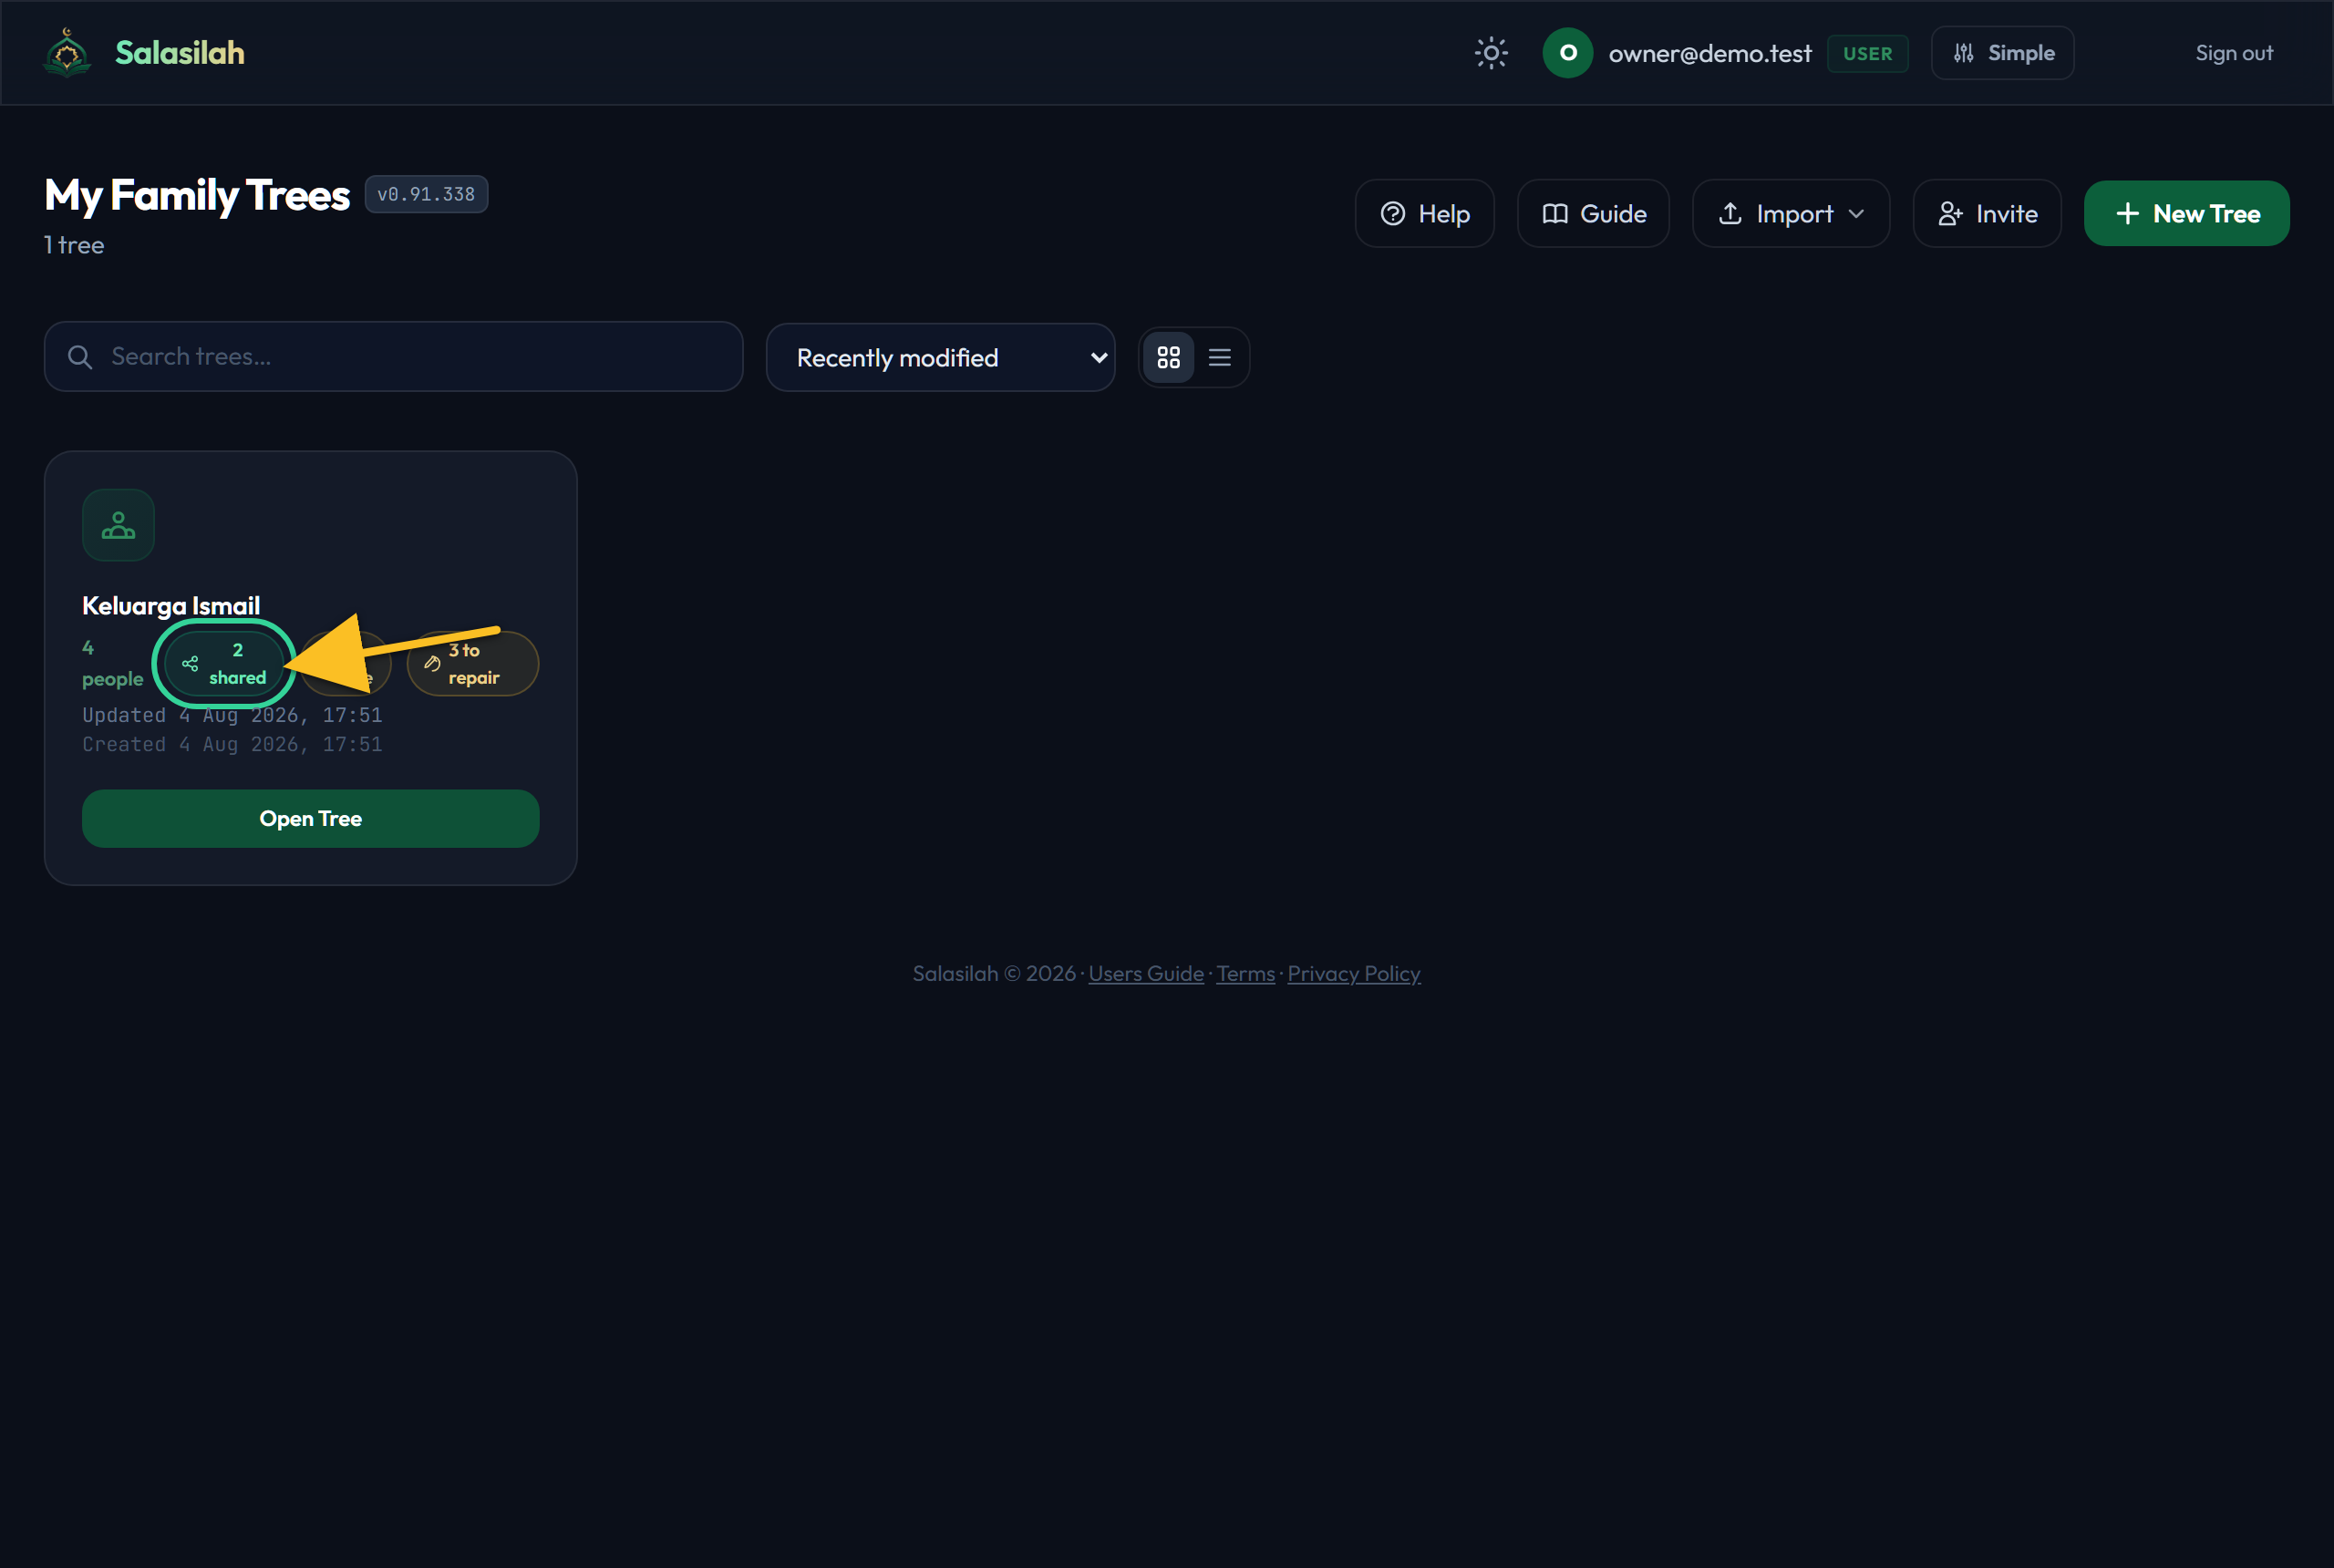
The shortcut: the "shared" badgeOwner
A tree that has live links shows a count on its dashboard card. Tapping it opens the share modal straight at the list above — switching to Advanced for you, since that's plainly a manage-what-I-sent intent rather than a make-another-one intent.