Collaborating on a family tree
Hand a relative one branch to fill in, watch their progress, and merge their work back into your tree — with a safety net at every step. Every screen below is the real app.
Keep the master tree
You assign a branch, watch progress, and decide what gets merged in. Nothing changes in your tree until you approve it.
Fill in a copy
They get their own editable copy of whatever slice you chose to send. They can't touch your master tree — they work in the copy.
Before you start: a safety copy
Duplicate a treeOwner
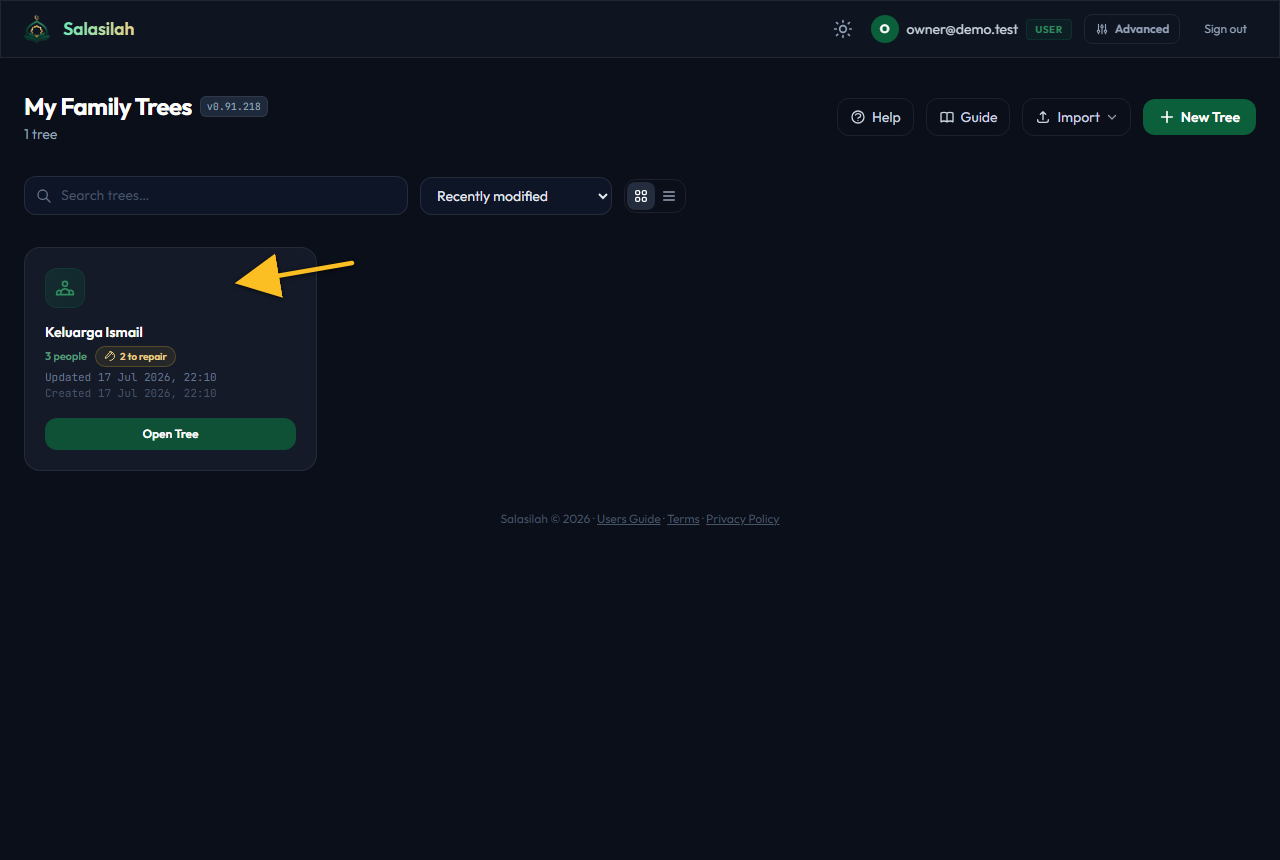
On any tree card, the duplicate icon makes an independent copy. Handy before a big change, and it's the same snapshot Salasilah takes for you automatically before a merge.
Hand a branch over — from the tree view
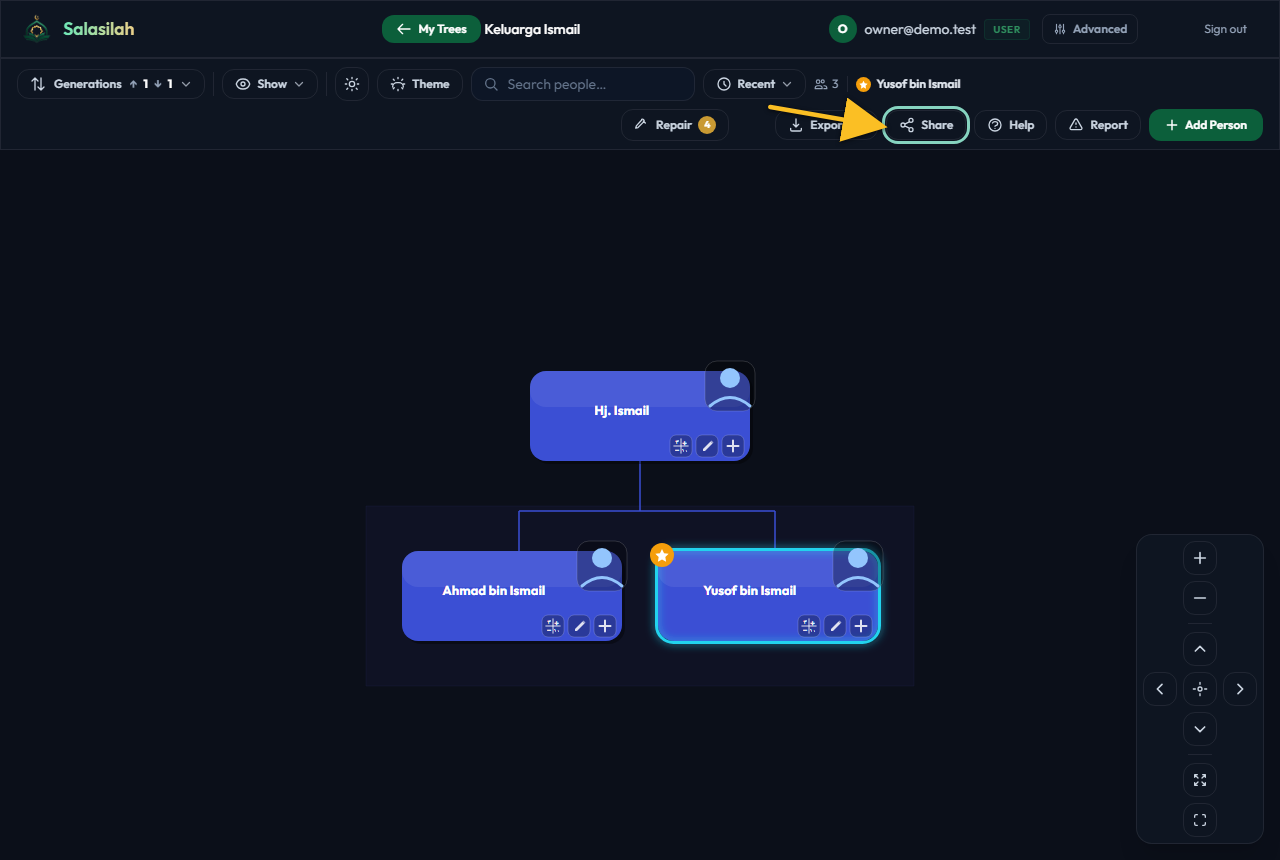
Open the tree and click ShareOwner
Sharing starts inside the tree, not on the dashboard. Open the tree, click the person the branch belongs to — here, Yusof — then click Share in the toolbar.
Why here? Because the only honest way to choose how much of your tree to hand over is to see it first. The next step measures exactly what's on screen.
Switch to Advanced and choose how much to sendOwner
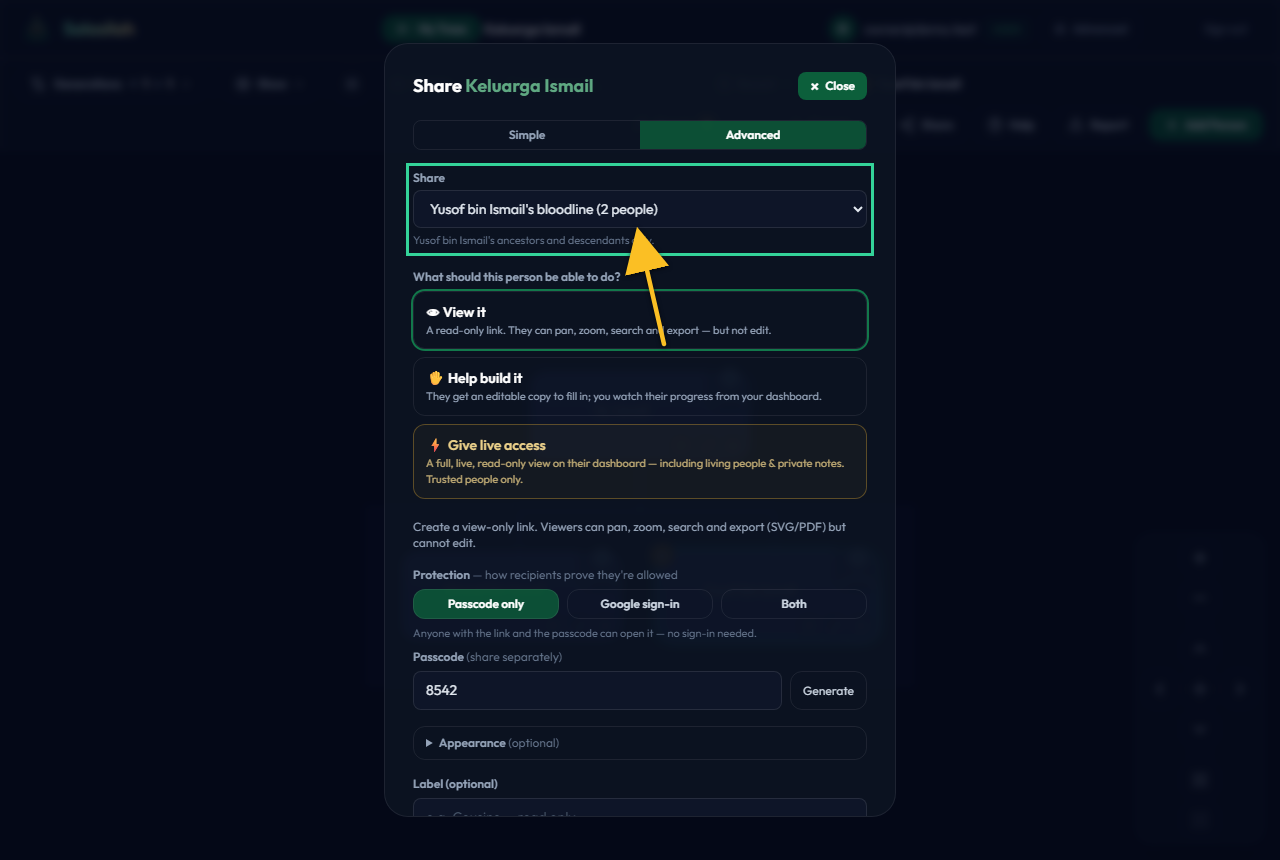
Flip the toggle from Simple to Advanced. At the top, the Share box offers three slices, each with a headcount:
Whole tree — everyone. · Current Tree View — only the people on screen right now. · ⟨Name⟩'s bloodline — that person's ancestors and descendants. Here we pick Yusof's bloodline.
Pick "Help build it" and enter their emailOwner
Under What should this person be able to do? choose ✋ Help build it, then type your relative's email address.
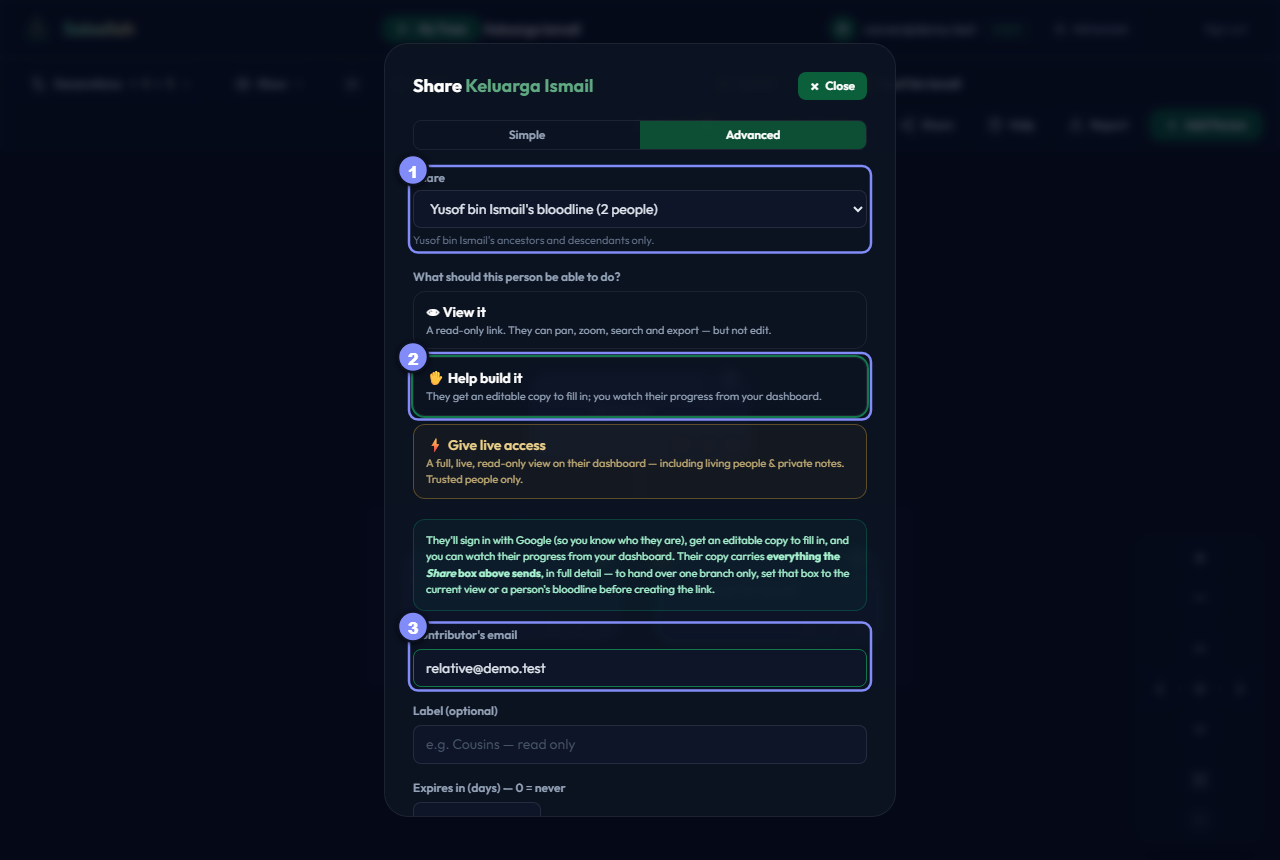
- Share — how much of the tree they get (set in the previous step).
- ✋ Help build it — an editable copy that reports back to you.
- The relative's email.
Create the linkOwner
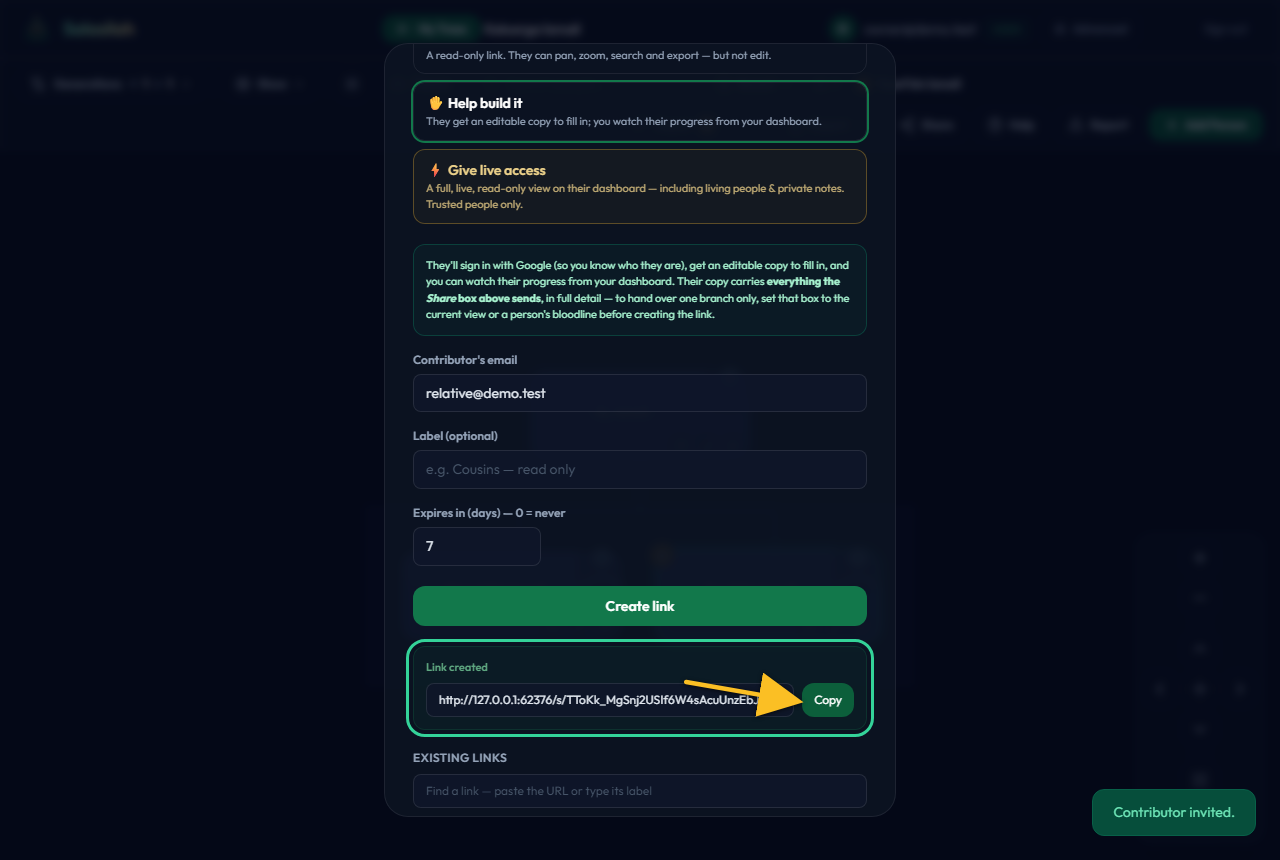
Click Create link and send the link (and passcode, if you set one) to your relative however you like — WhatsApp, email, anywhere.
It shows as awaiting acceptanceOwner
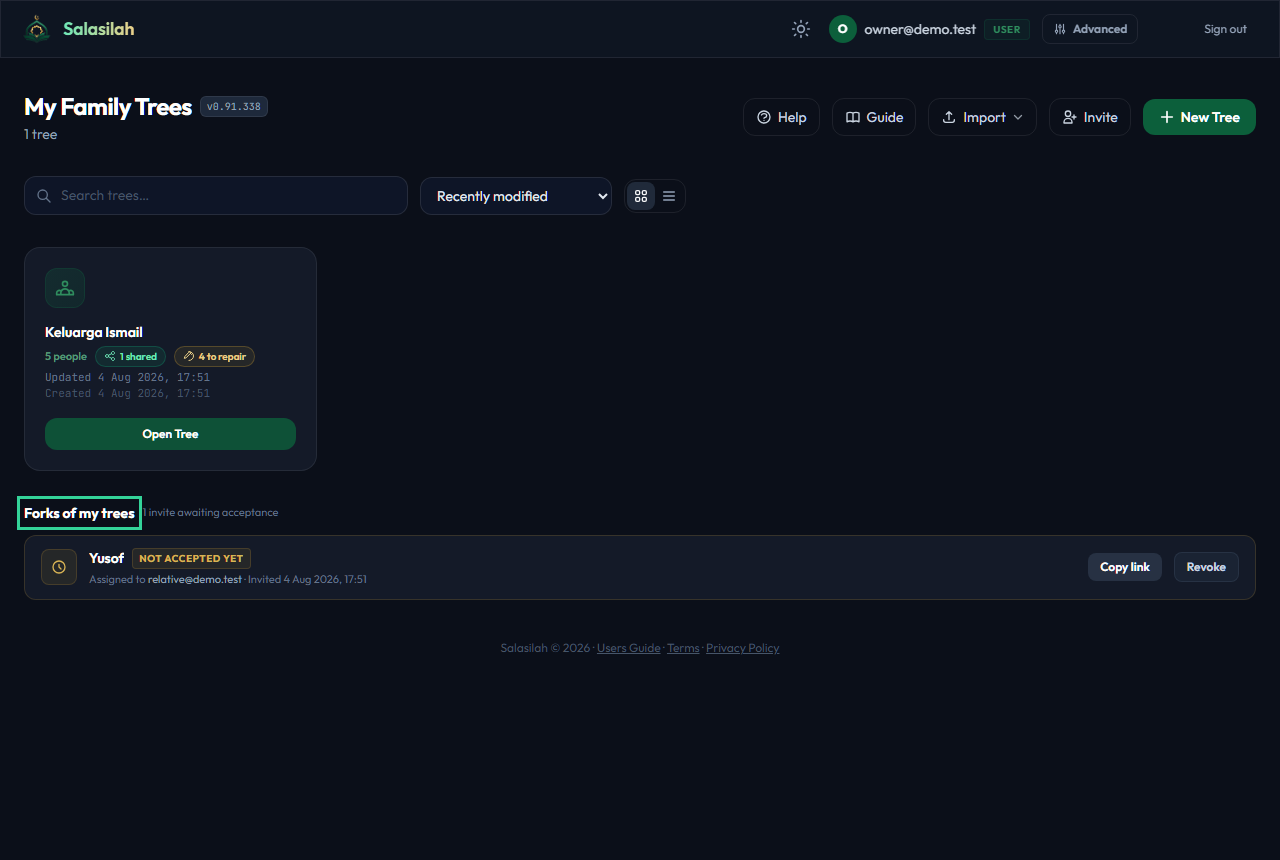
Back on your dashboard, a new Forks of my trees section appears with the invite marked Not accepted yet — so you know it's out there before anyone opens it.
Your relative fills it in
They open the linkRelative
The link opens a welcome that names you as the sender and explains they'll be filling in a copy you can merge back. They click Start collaborating.

They land in their own working copyRelative
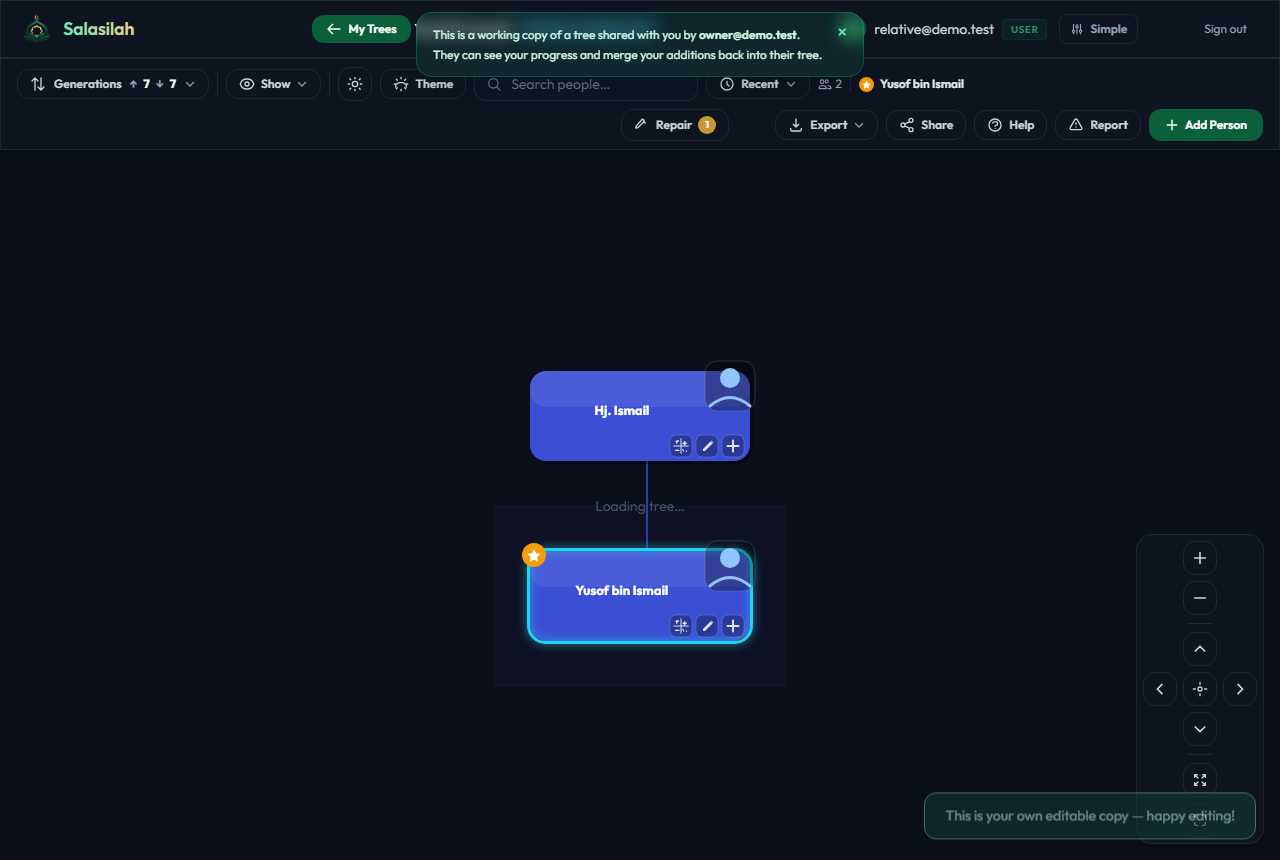
A banner reminds them this is a working copy you can see and merge. Everything they do here happens in their copy — your master tree is untouched.
They add peopleRelative
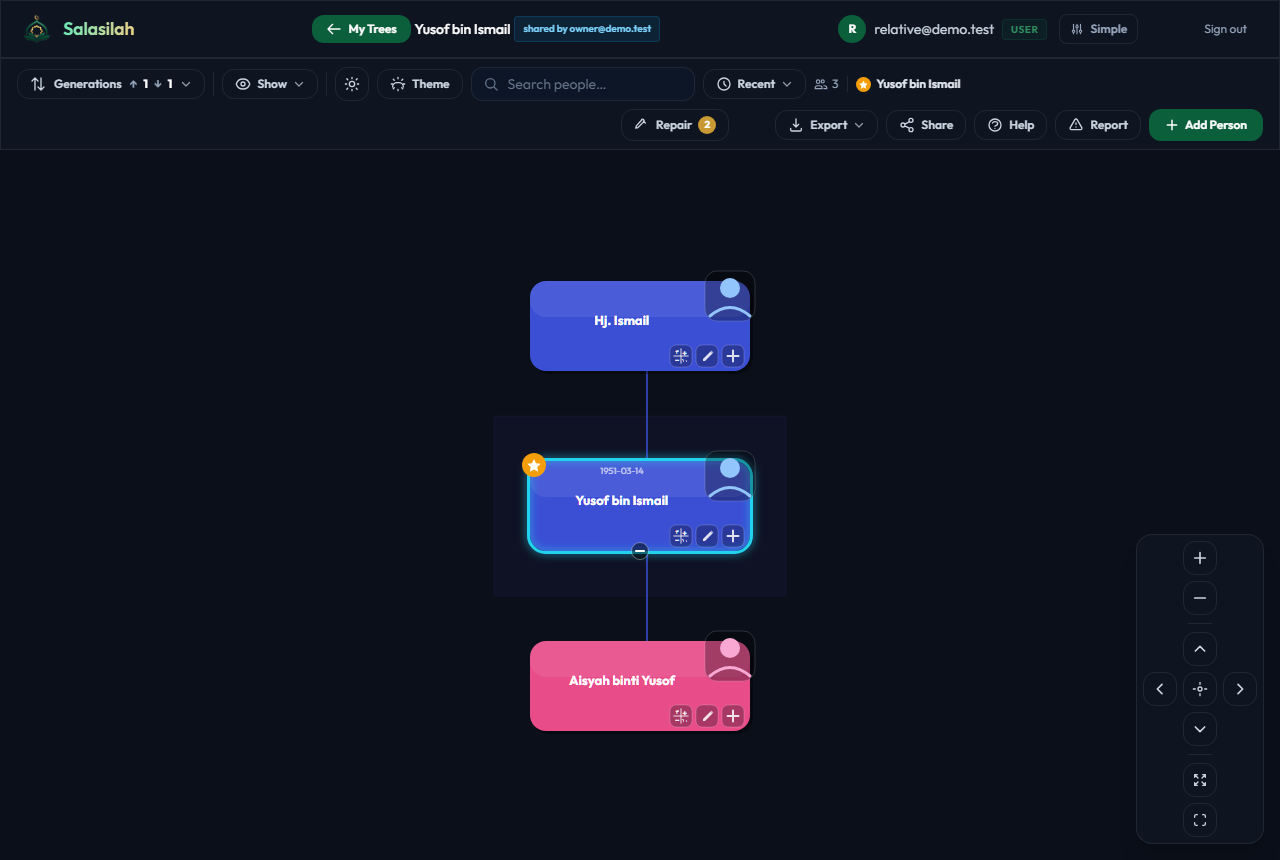
They use + Add Person to fill in their side of the family — here, adding Aisyah as a daughter of Yusof.
Watch progress & merge back
See progress in "Forks of my trees"Owner
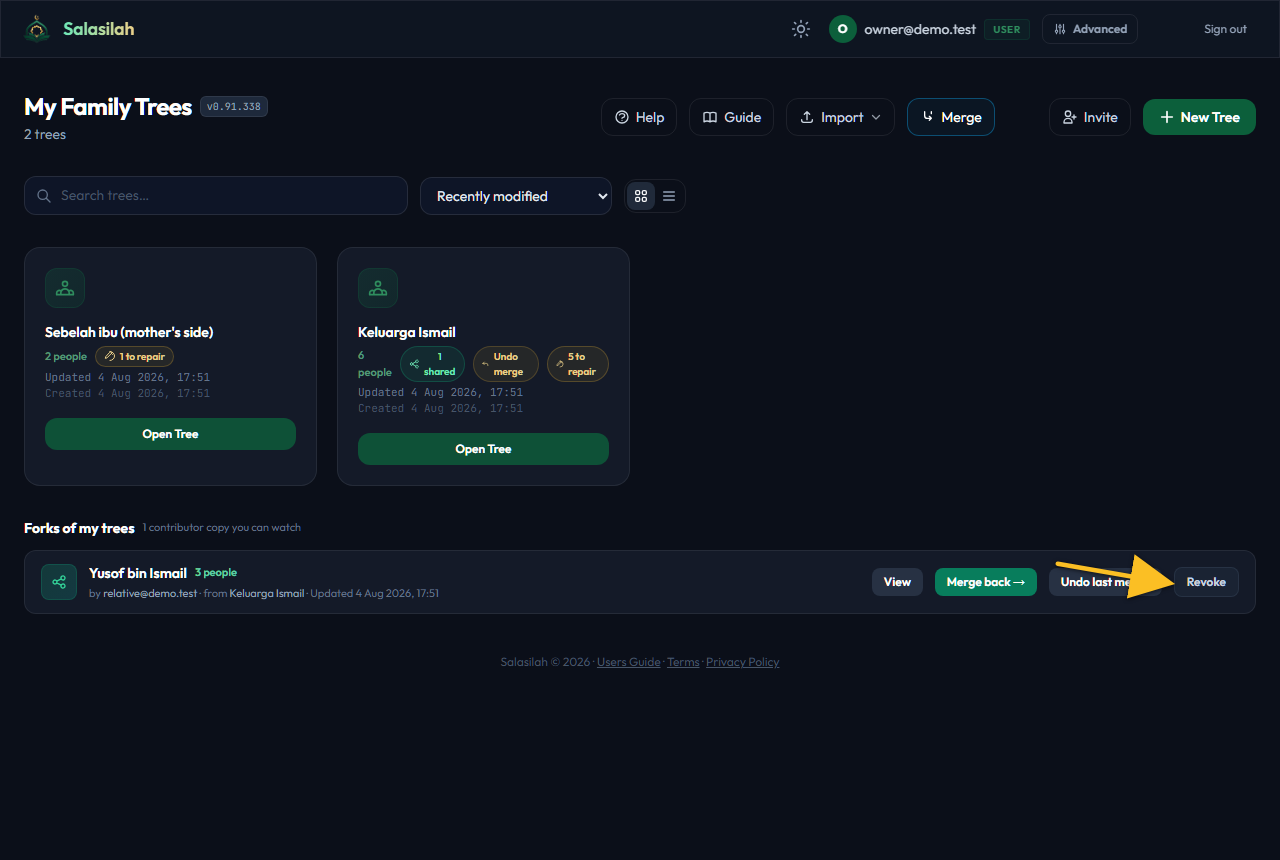
Once accepted, the invite becomes a live row showing the person count and when it was last touched, with View, Merge back →, and (after a first merge) Undo last merge.
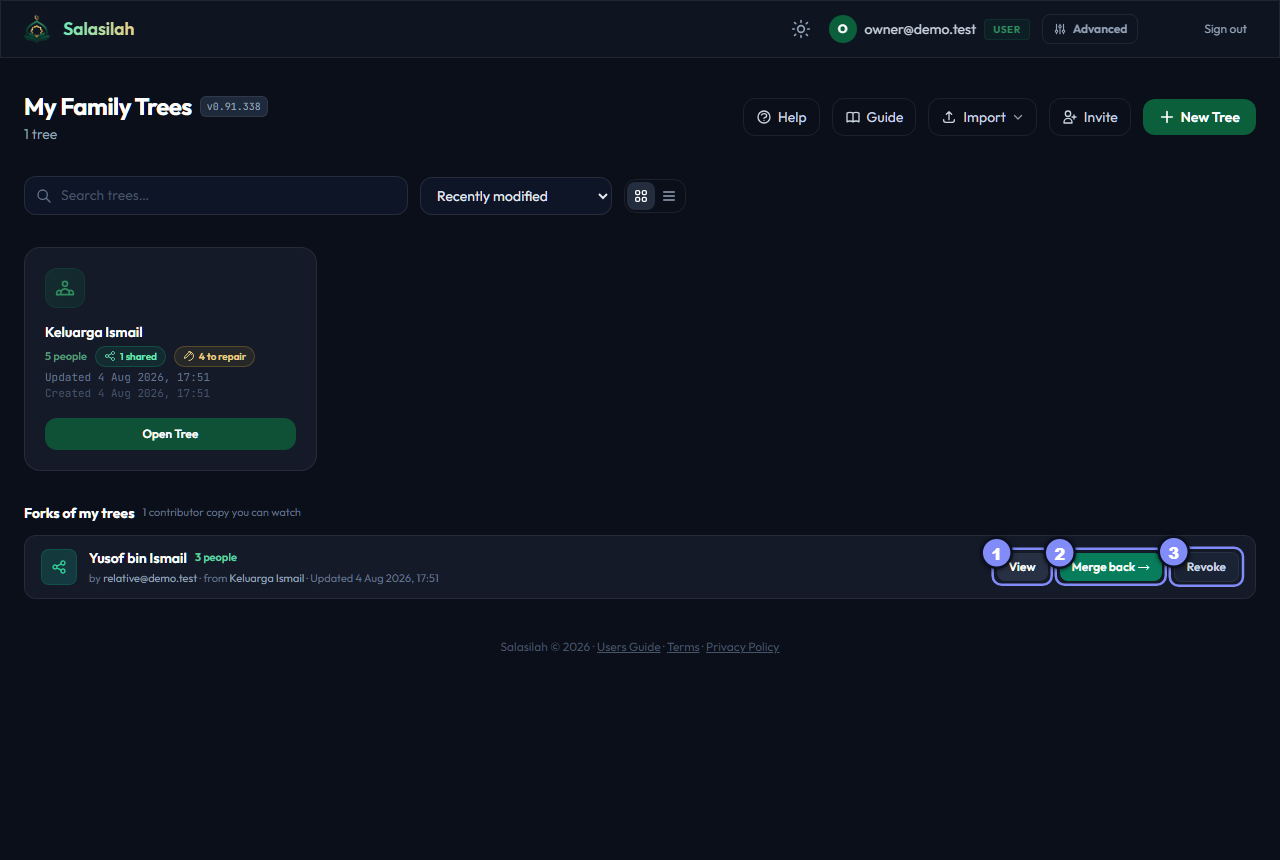
- View — open their copy read-only.
- Merge back → — review and pull their changes in.
- Revoke — end the collaboration.
Peek, read-onlyOwner
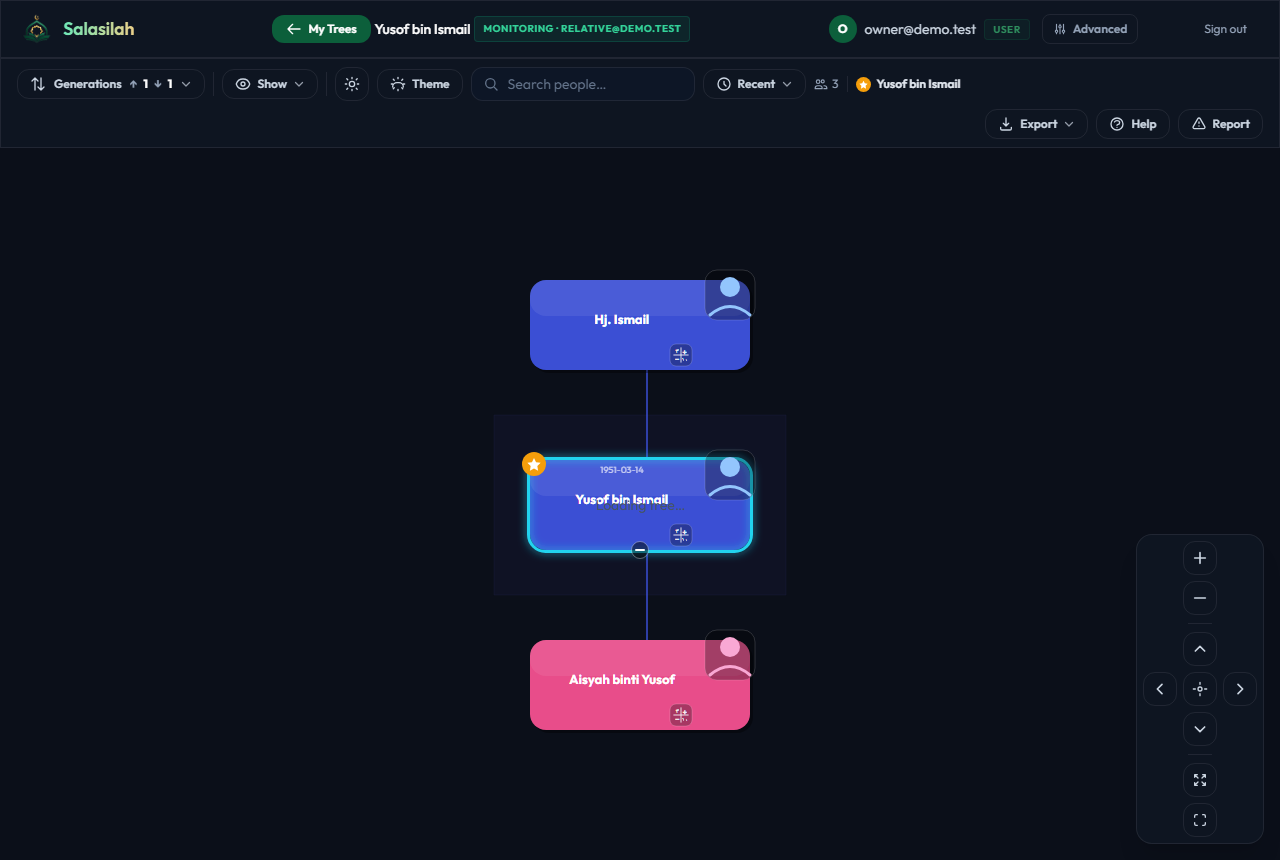
View opens their copy read-only, so you can check their work without changing anything.
Merge back — review firstOwner
Click Merge back →. Salasilah shows exactly what would change — people to add, fields to update, and any conflicts — before anything is written. Nothing commits yet.
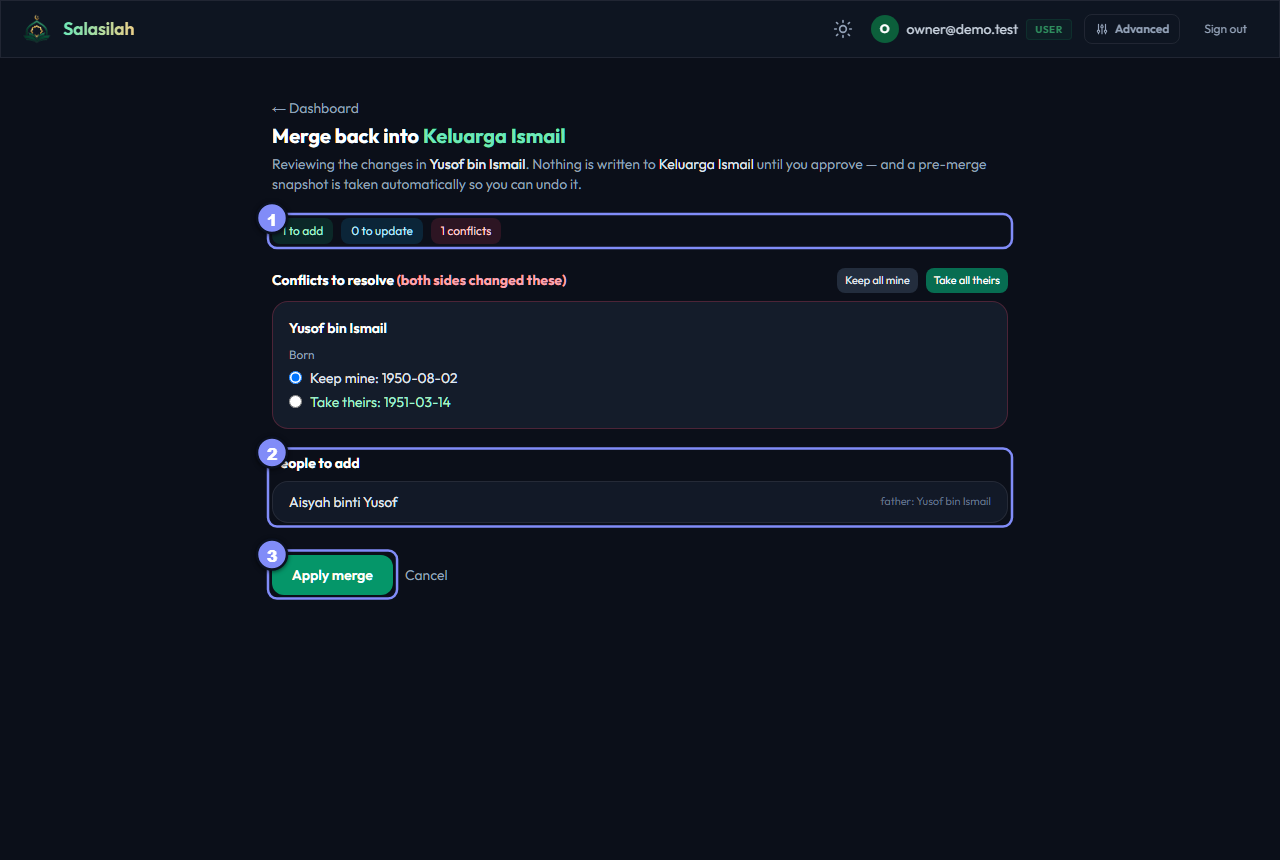
- A summary of exactly what will change — add, update, conflicts.
- People to add — the net-new people coming in.
- Apply merge — commit once you're happy (still nothing written until you click).
Resolve any conflictsOwner
If you and your relative changed the same detail differently, it's flagged as a conflict and you pick which to keep. The safe choice — Keep mine — is selected by default. Use Keep all mine / Take all theirs to decide in bulk.
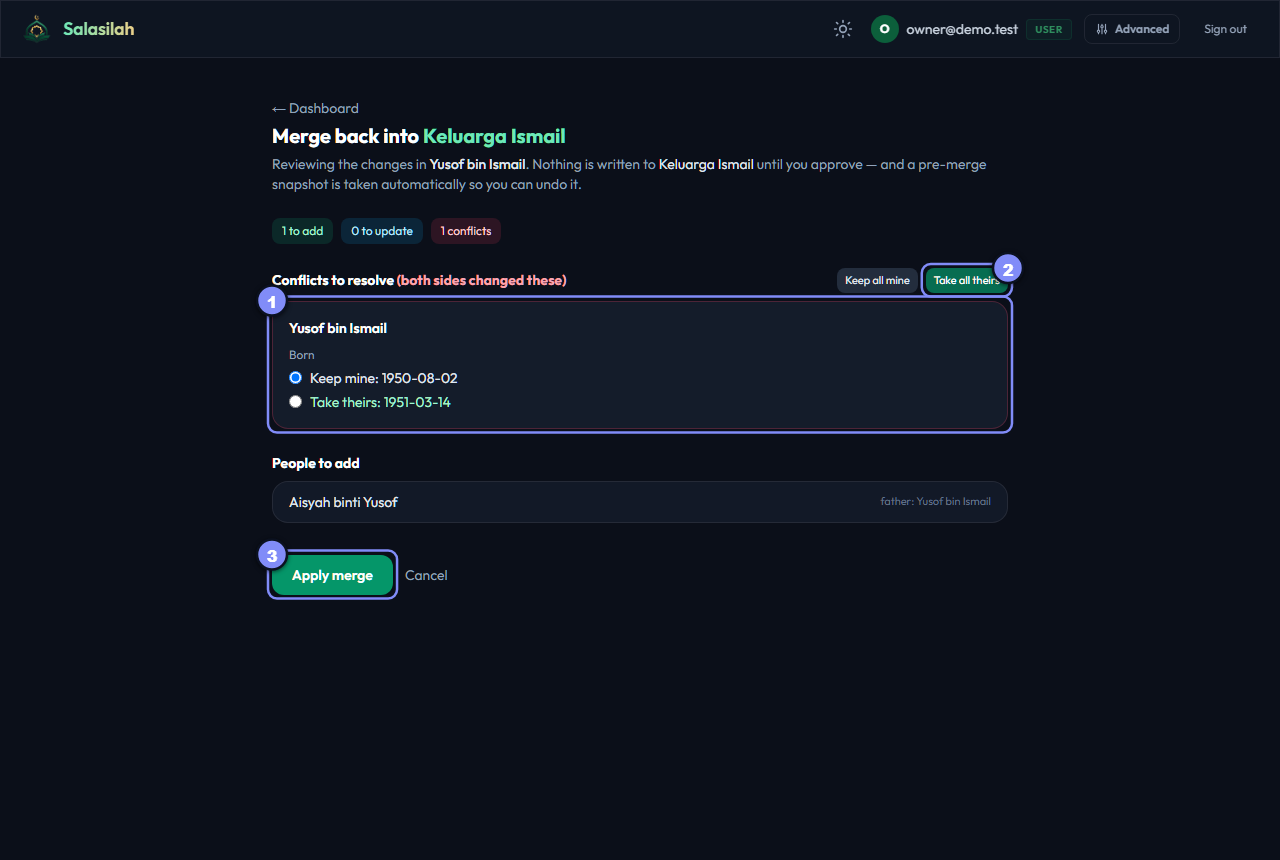
- Per field, pick Keep mine or Take theirs (mine is the default).
- Or decide every conflict at once — Keep all mine / Take all theirs.
- Apply merge when you've resolved them.
Apply — and it's doneOwner
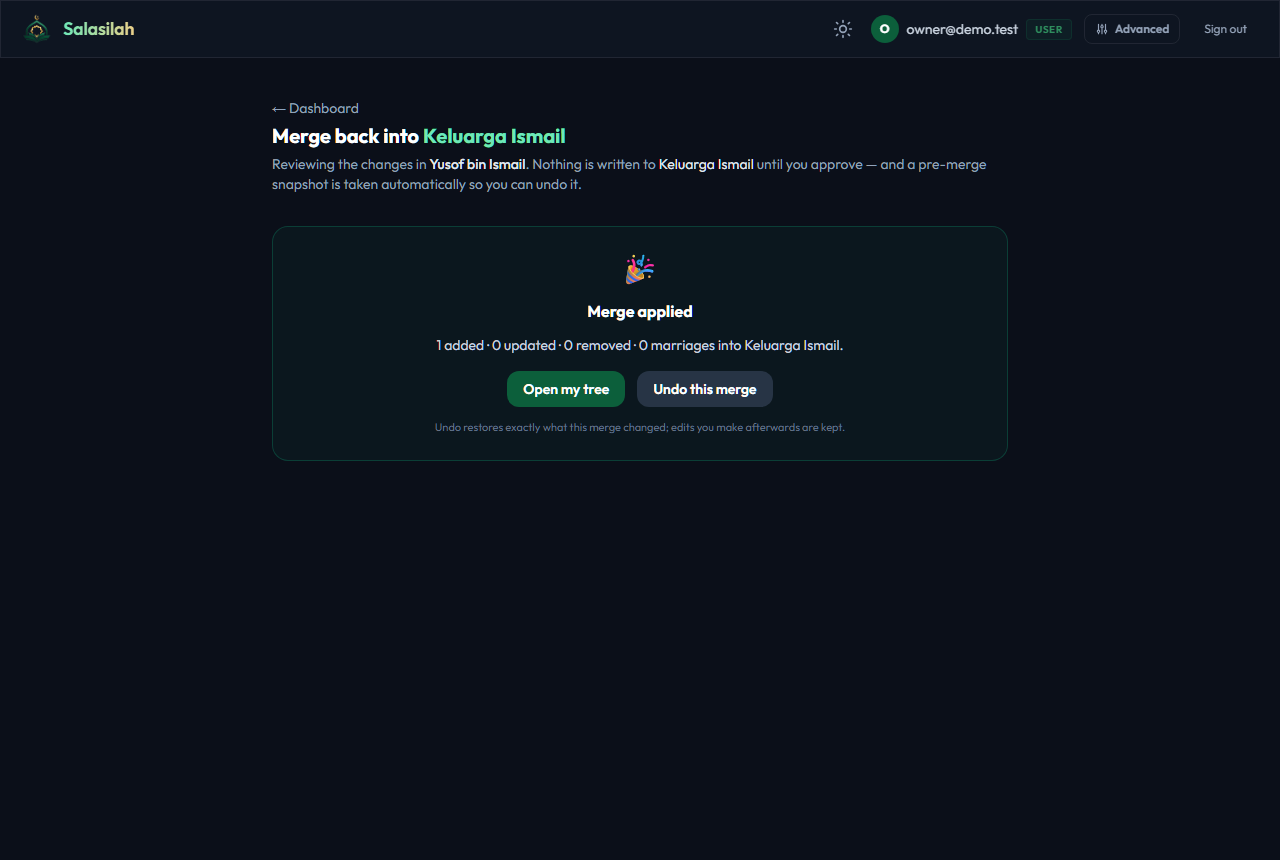
Click Apply merge. Salasilah snapshots your tree first (so you can undo), then writes the approved changes into your master tree.
Your relative is toldRelative
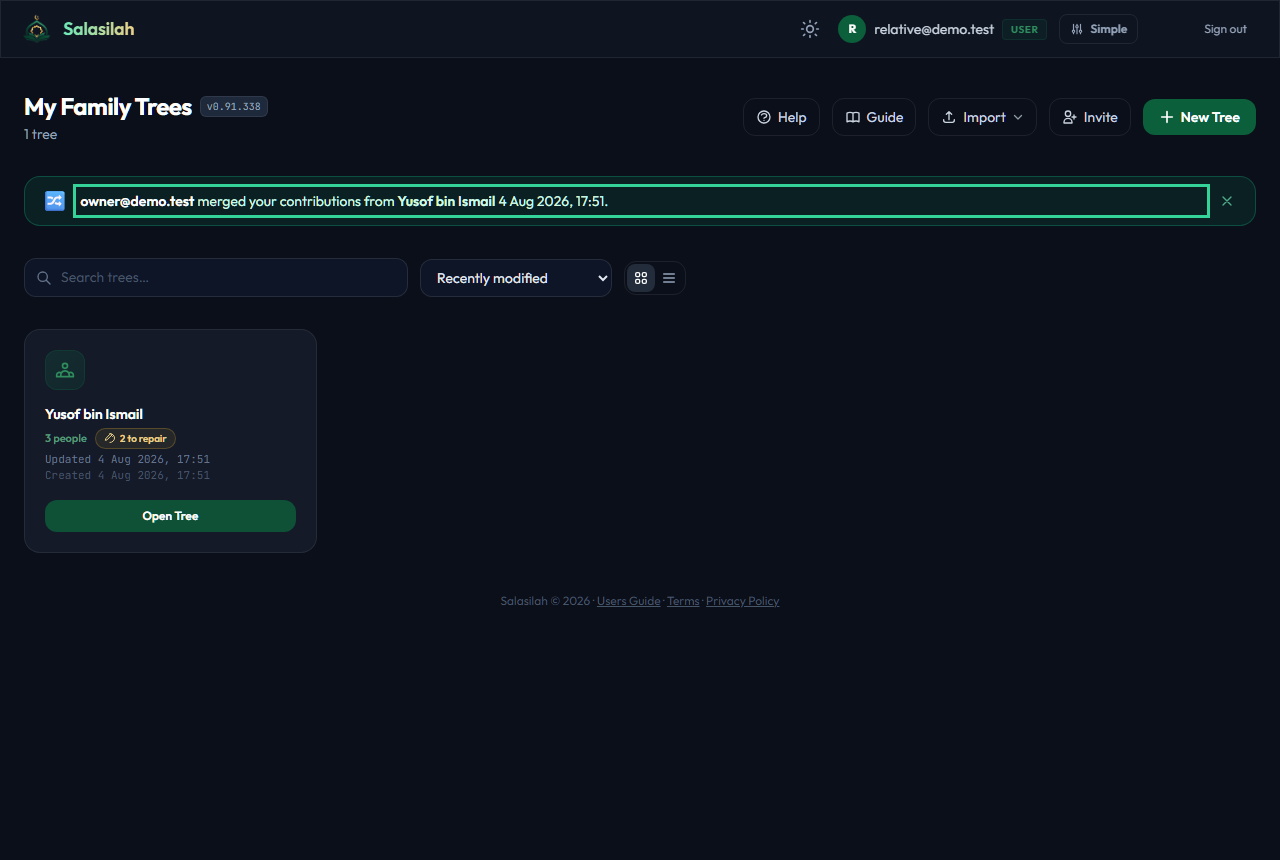
Merging is never silent: your relative sees a notice on their dashboard that you merged their contributions, which they can dismiss.
Undo a merge, if needed
The Undo-merge buttonOwner
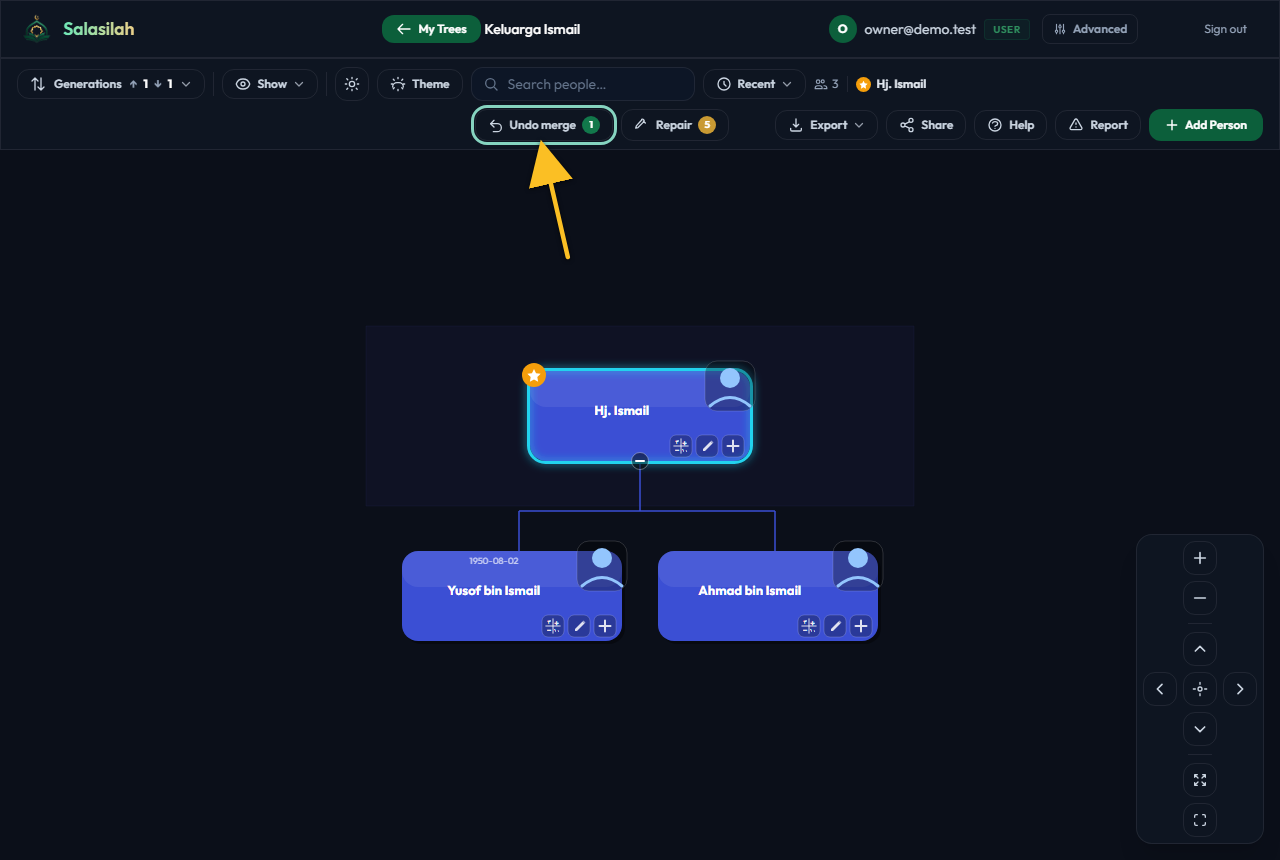
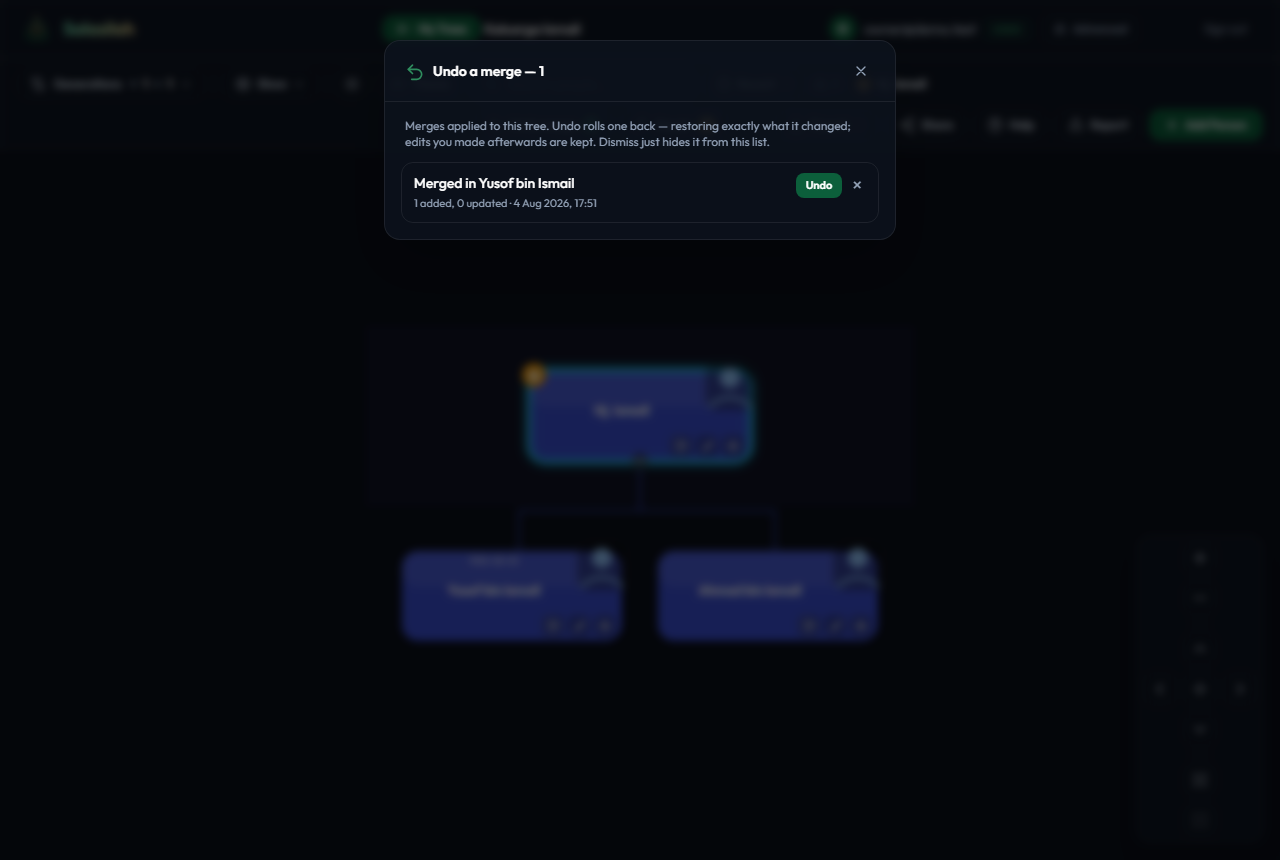
Open your merged tree and you'll find an Undo merge button in the toolbar with a count badge. It's only there while there's a merge you could still roll back.
Undo or dismissOwner
Clicking it lists your recent merges. Undo restores exactly what that merge changed (later edits are kept); Dismiss just clears the reminder without undoing.
Merge in your own small tree
The Merge buttonOwner
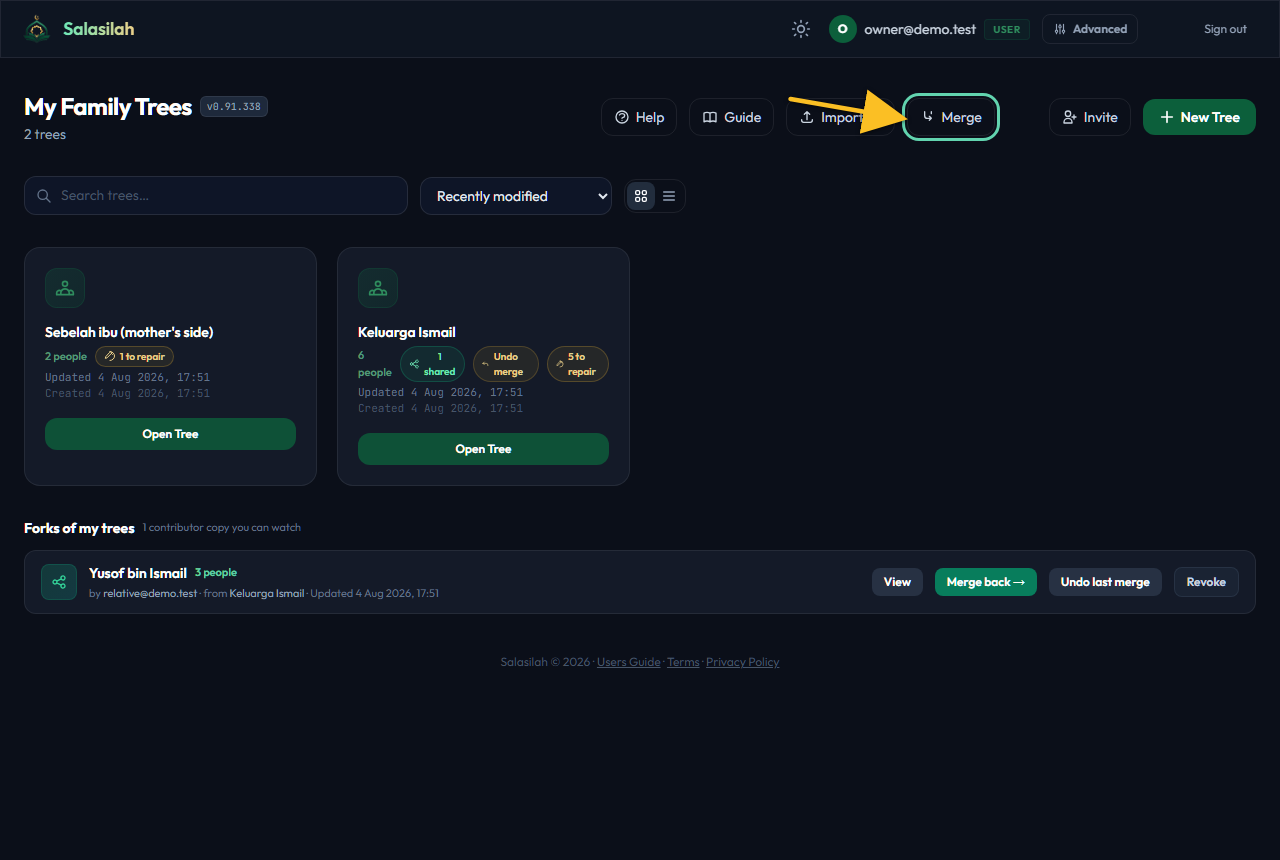
Built a small tree separately (a mother's side, or one imported from a file)? In Advanced mode the dashboard shows a Merge button next to Import for folding it into your main tree.
Pick the two treesOwner
Choose which small tree to merge, and which tree to merge it into. Only the target changes; the source is copied, not moved, and stays on your dashboard.

- Merge this tree — the small tree to fold in (copied, not moved).
- Into this one — your main tree, the only one that changes.
- Continue — on to matching people.
Confirm who is whoOwner
Because the two trees were built separately, Salasilah can't know who's the same person — so you confirm every match. For each person you pick Same as … or Add as a new person. Even identical names are never linked automatically.
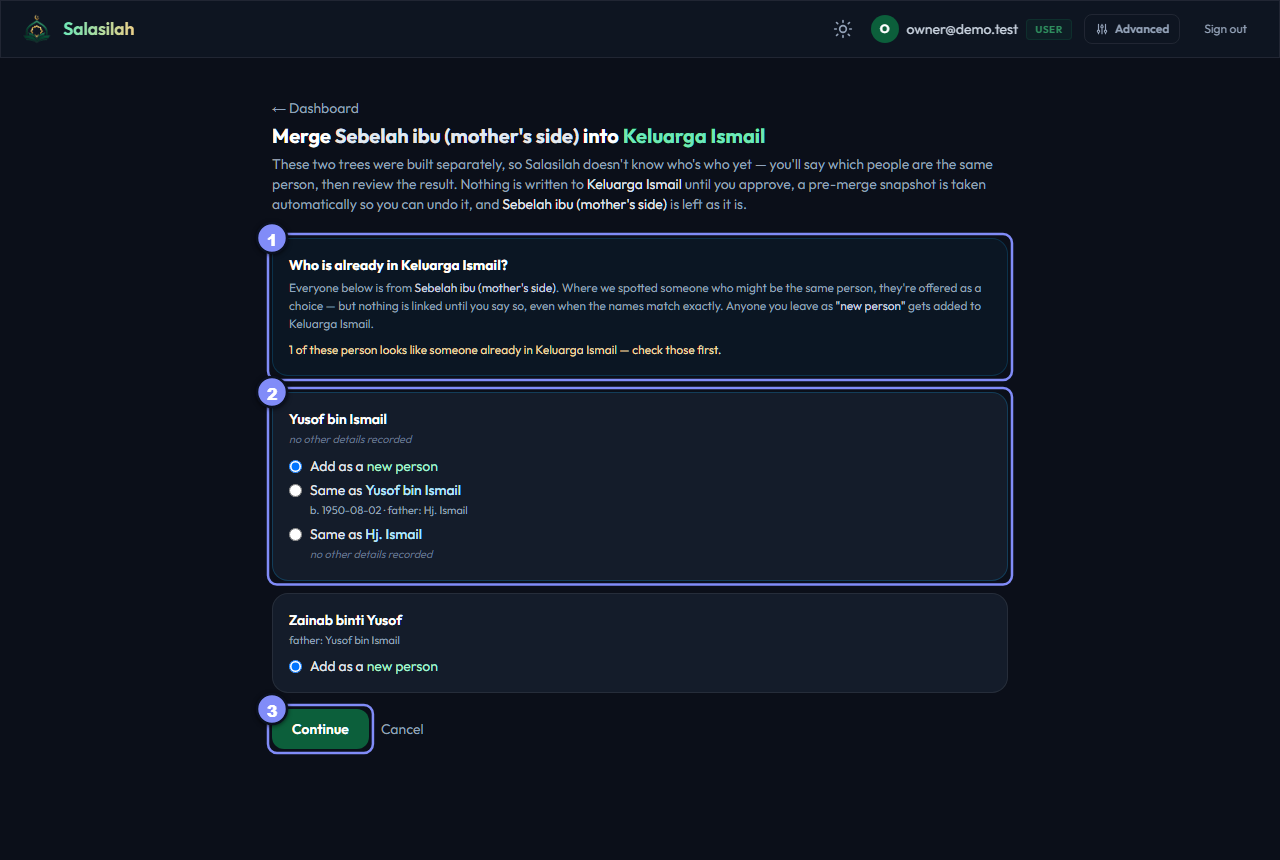
- Read who Salasilah thinks might already be in your tree.
- For each person, pick Same as … or Add as a new person.
- Continue to review and apply the merge.
End a collaboration
Revoke accessOwner
When a branch is done, Revoke on its row ends the collaboration: it drops off your monitor panel and the share link stops working.